Under-sanding on a drywall job can ruin the finish after everything's painted, leaving ridges and grooves that will really stand out in direct light. And over-sanding can also leave you with a rough, uneven finish. So striking the right balance every time you sand is going to be absolutely crucial for ensuring a beautiful finish and a happy customer. How do you get a top-notch sanding game? Learn from the best! Check out the video below from the Build Show Network, where Lydia Crowder (aka Drywall Shorty) shares her best drywall sanding tips with you.
Drywall Shorty Shares Her Best Drywall Sanding Tips

When it comes to all things drywall finishing, Lydia is a true professional, and her sanding expertise is one of the elements that makes her so good at her job. Sanding may not be the most fun part of the finishing process, but it goes a long way toward elevating the entire look of a space, polishing everything up for a pristinely smooth wall — as Lydia says in the video: a soft, smooth sanding job will leave a soft, smooth finish.
Lydia covers a lot of ground in her 10-minute video, but let's go through a few of the big takeaways we think will really help finishers enhance their sanding abilities.
Choose the right grit for the job
First, you're going to need to pick the right grit for your abrasives to handle each sanding job. The higher the grit number, the finer the sander, and they get rougher as you go into lower grits. If you've got lighter coats of mud, you're not going to want a low-grit abrasive, as you risk leaving scratches on your wall; on the other hand, if you've got several layers of mud to sand through, a finer-grit sander is just going to be a waste of your time.
Work your way around the room
Start sanding on the ceiling, then pick a spot in the room and work your way around from there. For instance, Lydia likes to start with the first wall to the left from when she enters, and works her way through the room back to the exit. If you ping-pong back and forth through a space, there's a better chance you'll miss a wall and will want to bang your head against it during the next phase of the finishing process.

Never underestimate a Black Widow Pro Sander
To quickly and expertly cover a large surface area, and to hit those small corners and hard-to-reach spot, your best friend is going to be the Black Widow Pro Sander. With a long aluminum pole and a variety of sanding pads you can quickly swap in and out, Black Widow is key to getting to the end of this job with far less soreness or fatigue. Its square head makes it perfect for reaching those small upper corners that have been thorns in the sides of finishers for ages, and its swivel design makes it easy to sand long runs into small details in a single stroke.
If you've feathered your mud well, you should be able to use a fine-grit Black Widow sanding pad on just the outer edges of the mud on your seams and butt joints.
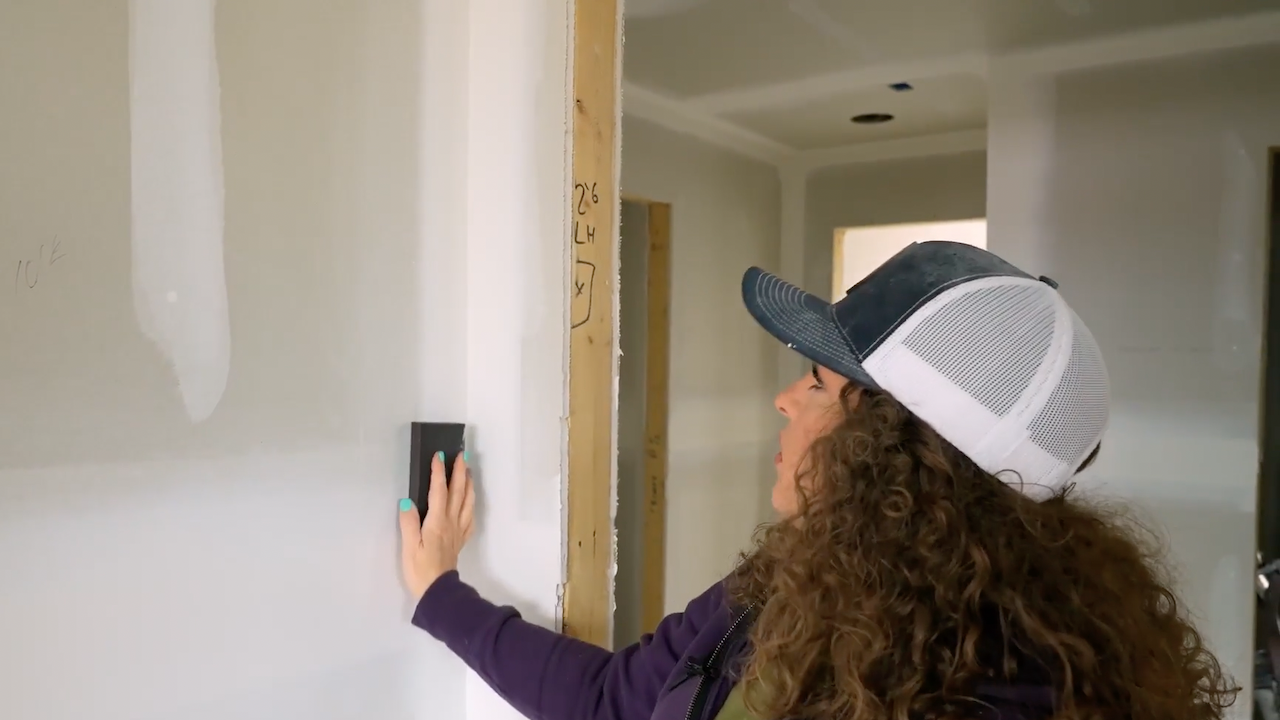
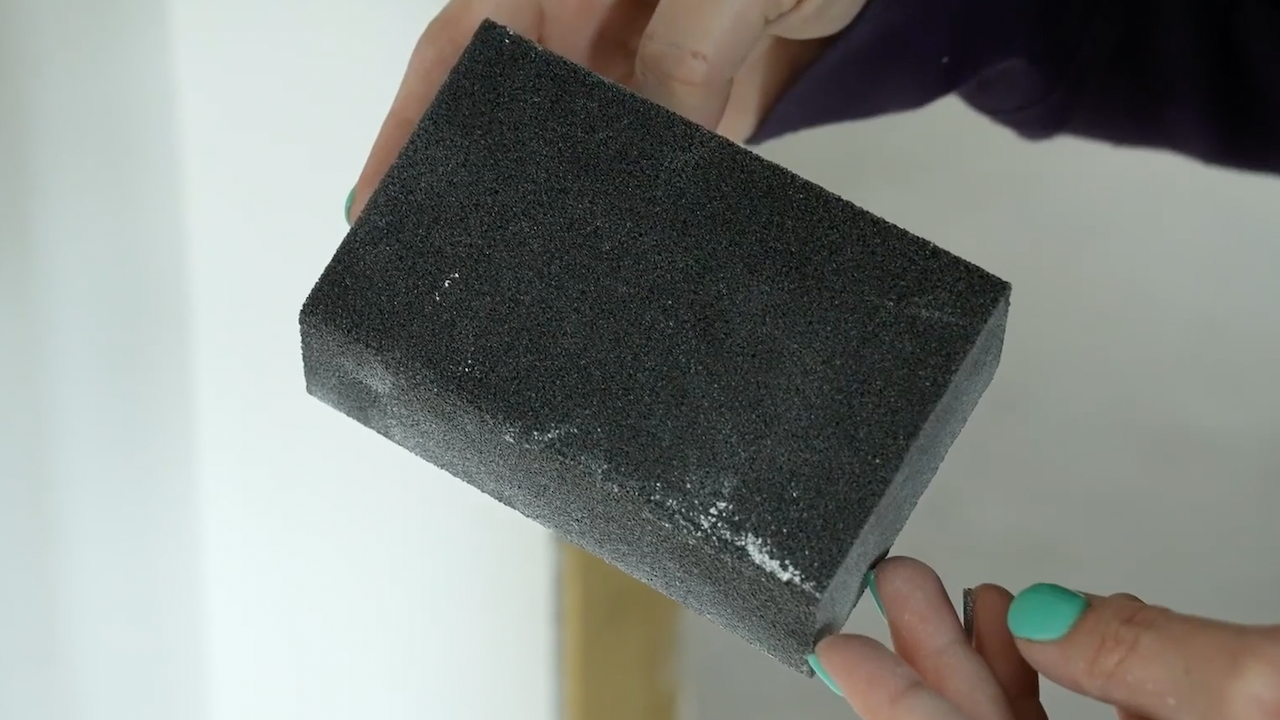
Use sanding sponges for detailing
Now that you've covered your larger surface area with the Black Widow Pro Sander, you can dive into the smaller details with one of our sanding blocks. If you just want one sponge for a variety of spots, we'd recommend going with the Dual Angle Dual Grit Sanding Block, allowing you to tackle just about any angle with a single solution, featuring one finer side and one rougher. But you can't go wrong with a Single Angle Sanding Block or Standard Sanding Block either.
One of the advantages of hand-sanding is that you can feel for humps in the mud as you go, showing your where to focus your energy. Use the sanding block in a circular motion for a smoother finish, and be careful around paper tape — over-sanding these areas risks furring the paper.
Bonus tip from Lydia: before using your sanding blocks, take two and rub them together. This is get rid of any possibly build-ups of abrasive materials that could put a scratch in your wall, and softens the sanders up a little so you're not accidentally over-aggressive when you get started sanding.
Keep an extra sponge in your back pocket
One of Trim-Tex's sanding blocks will last you long time, but we'd always advise keeping an extra ready to go. If the surface of the sanding block starts to tear away, there's a chance you could gouge the finish. So, once you start to notice some fraying on the block, stop using it and switch it out for a fresh one — keeping an extra in your back pocket during sanding makes you able to do this without missing a beat.
Check out more of Lydia's awesome videos for the Build Show here, and be sure to follow her popular Instagram page for more tips. Our line of abrasives are just one way we try to help tradespeople be the best drywall finishers they can be. Hit the button below to request a full catalog, and discover the full extent of what Trim-Tex has to offer!

Find Your Next Solution
Request your copy of the latest Trim-Tex catalog, available in either print or digital editions