Create Flush Baseboards with Architectural L Bead

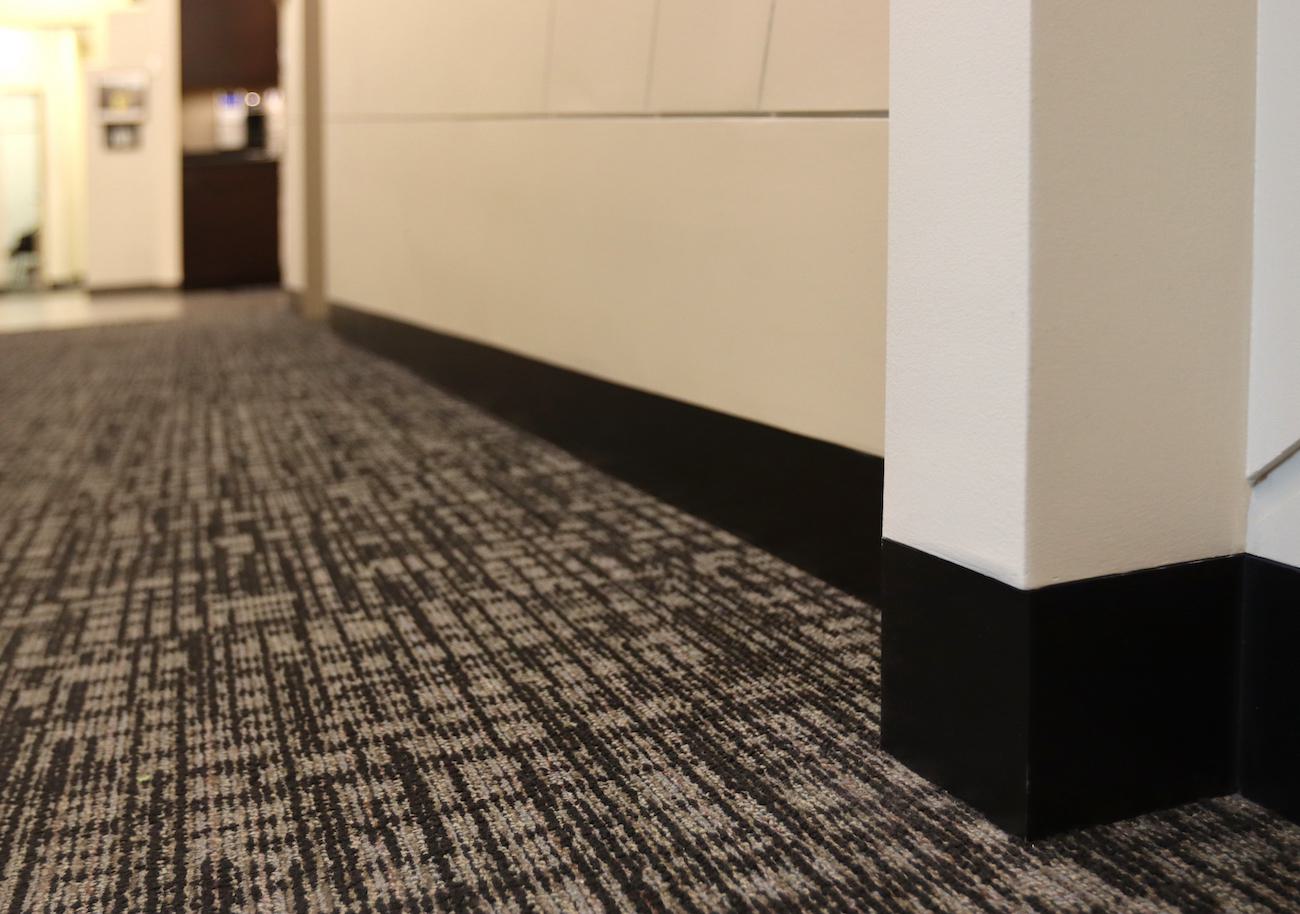
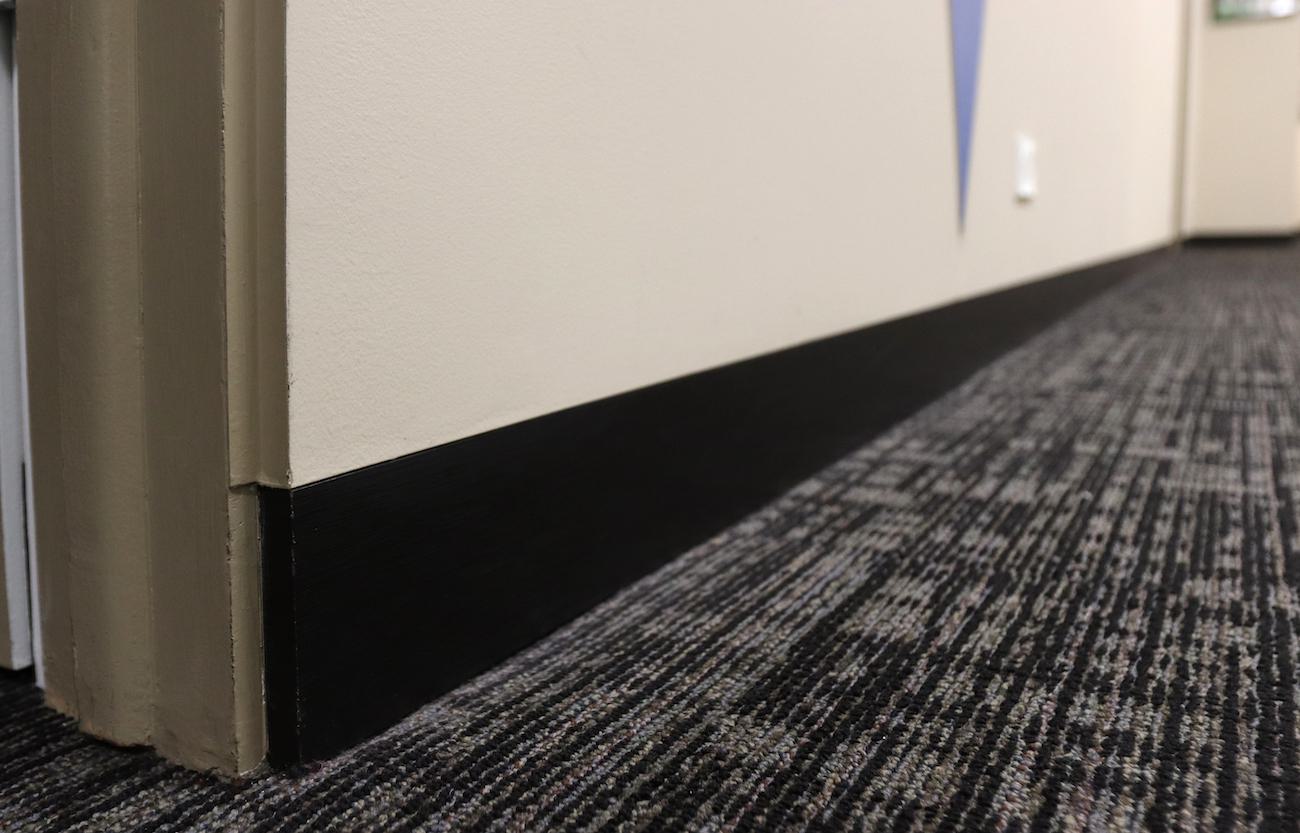
Why would you want to create flush baseboards? Well, there are a couple great reasons to consider the style. For one, traditional baseboards gather unattractive dust over time, which can lead to tedious routine upkeep at best and unnecessary maintenance costs at worst. Flush baseboards solve this problem entirely because there is no surface for dust to settle on. And secondly, it just looks sharp — it’s a modern, minimalist look with clean lines, and it subtly steers a room’s finish away from what’s expected.

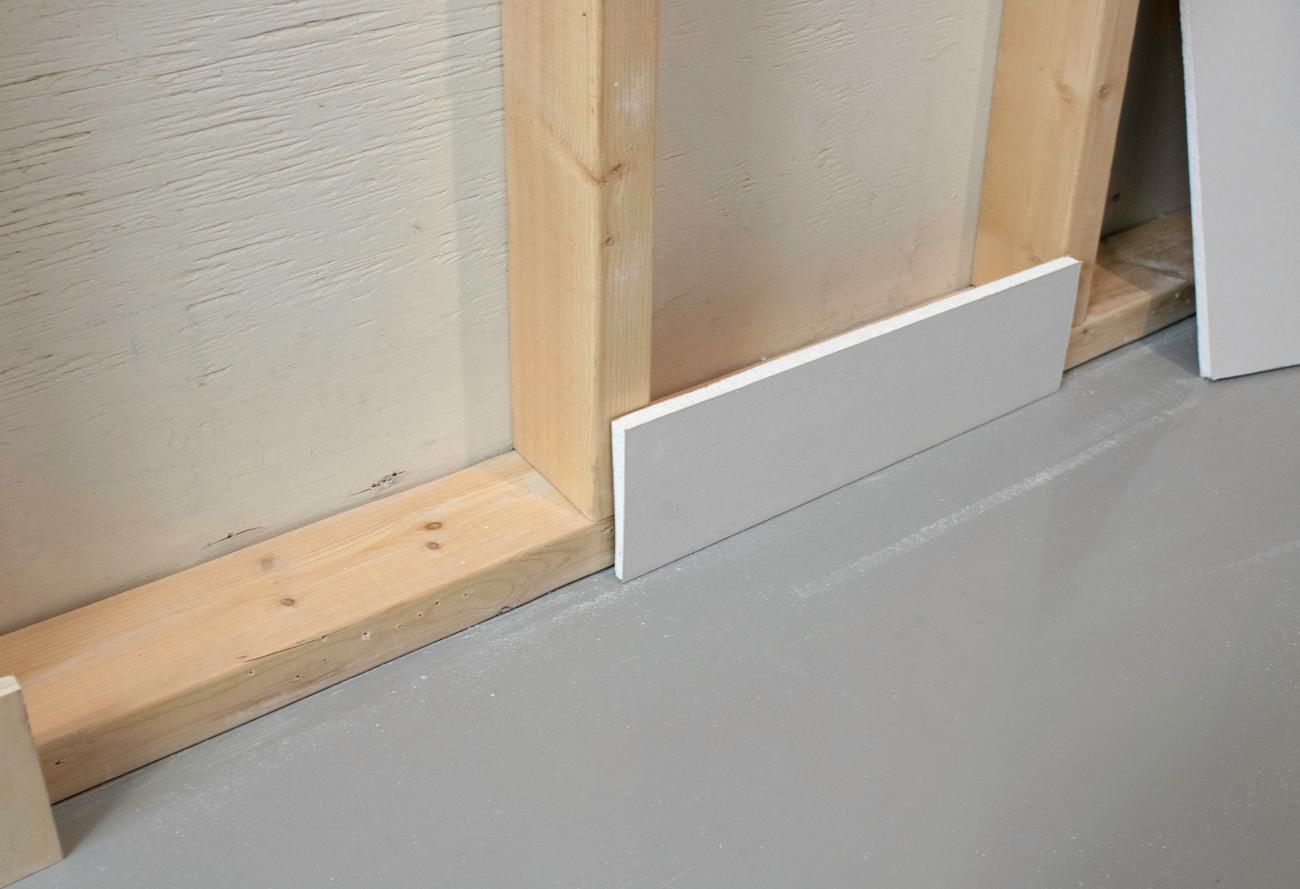
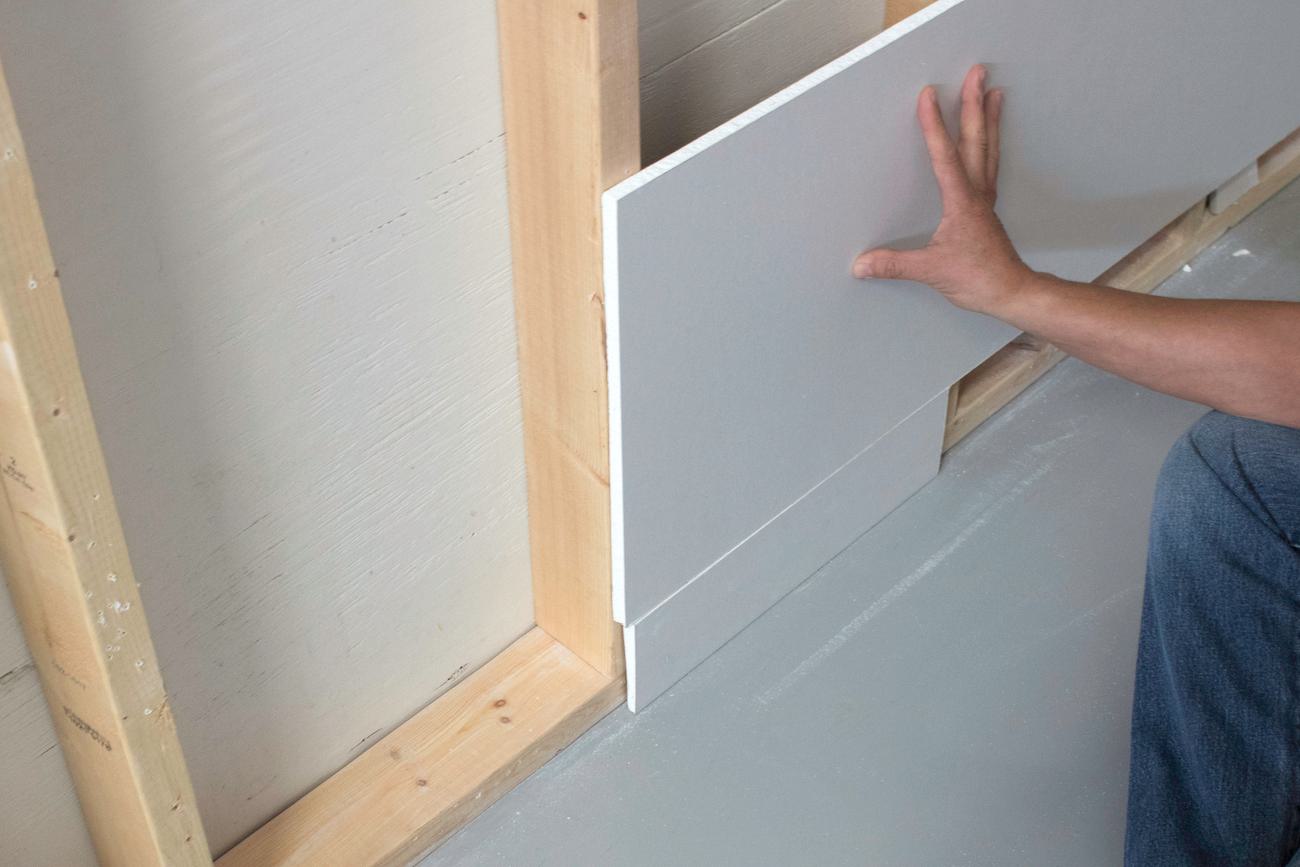
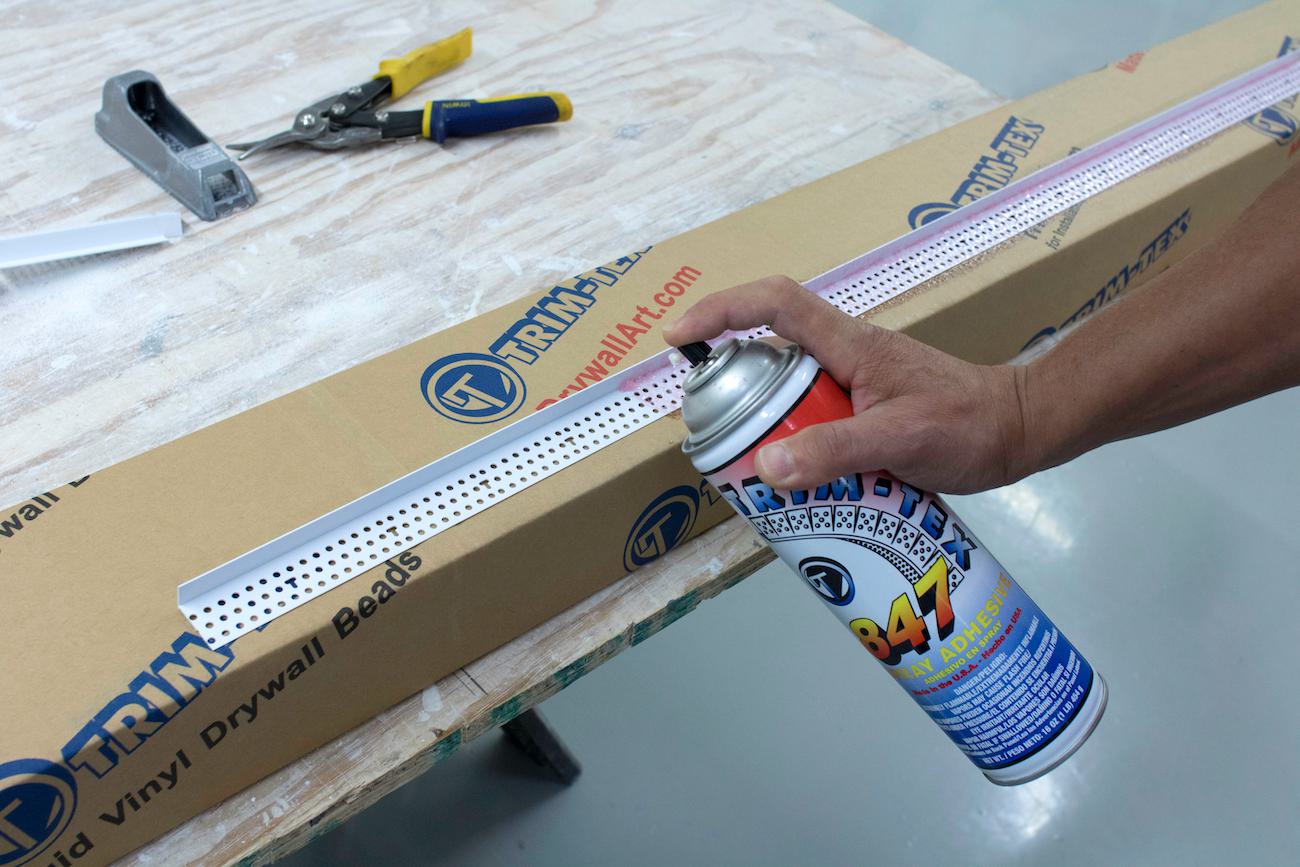
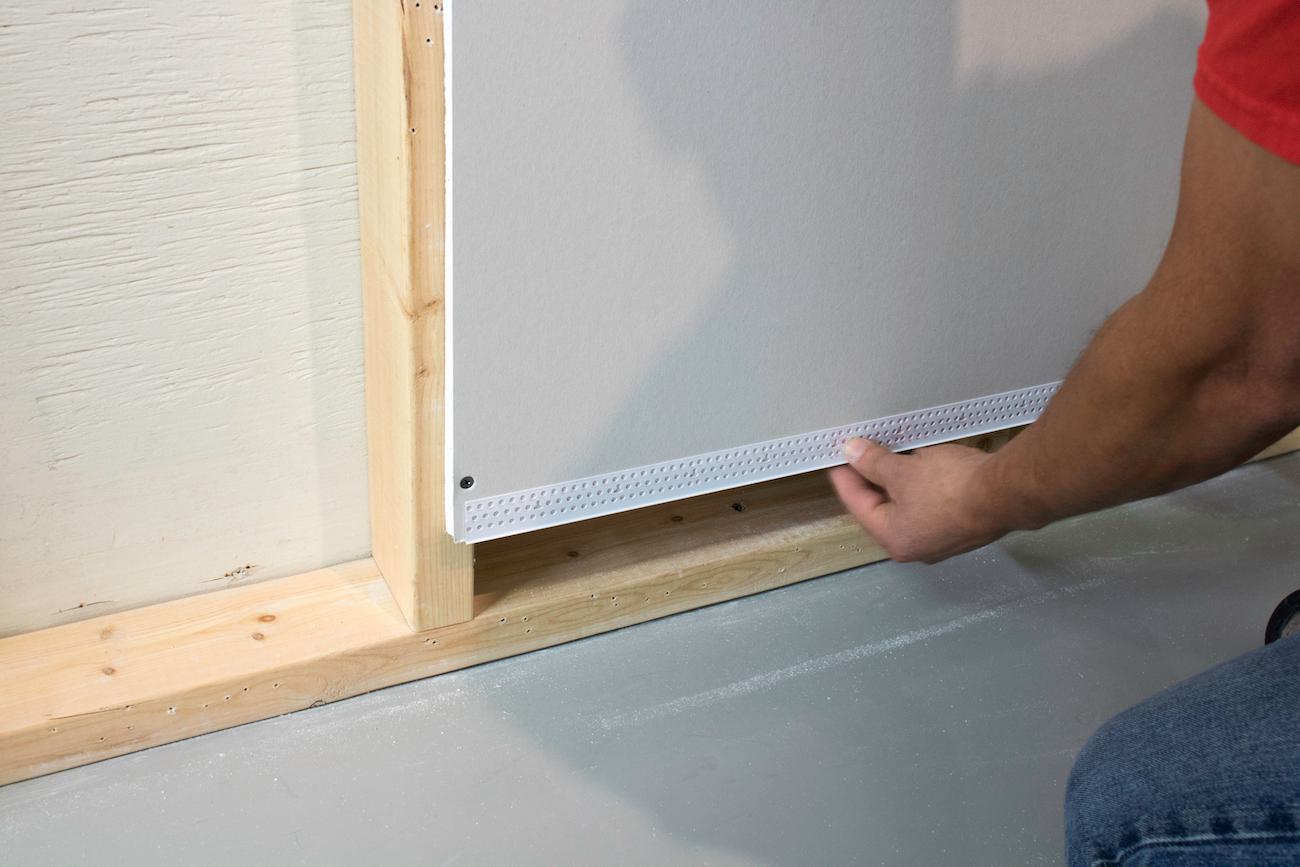
Flush baseboards also aren’t all that difficult or expensive to execute, either; they just take some extra planning, and maybe a little help from a vinyl corner bead solution. Here’s how to utilize Trim-Tex’s Architectural L Bead to create flush baseboards that are stylish and clean, without spending much time or money to make it happen.

Architectural L Bead_Flush Baseboard_Hallway 3

INSTALLATION TECHNIQUES TO CREATE FLUSH BASEBOARDS

Let’s start from the bottom and work our way up — we’d recommended that you install the floor prior to the drywall and baseboard if you want to have a flush finish here. Take careful measurements to determine if the floor is uneven, because if so, you’ll have to trim the baseboard as needed to accommodate the irregularities. If, for instance, the floor is 1/4" higher on one side of the wall, incorporate the difference when installing the drywall to prevent a gap once our Architectural L Bead and baseboard are installed.

Determine the desired height of your baseboard (of course, it needs to be the same thickness as your drywall) and cut a piece of scrap drywall down to that same size to function as a spacer. Temporarily screw the spacer to the base of your wall — this will act as a guide when installing the drywall.

Architectural L Bead_Flush Baseboard_5

Now that your spacer’s in place, simply rest the sheet of drywall on top of it during installation to ensure accurate measurements for your baseboard. Once the drywall is fully installed, you can go ahead and remove the spacer before installing Architectural L Bead.

Architectural L Bead_Flush Baseboard_4

Architectural L Bead is tailor-made to create sharp, clean lines like ones we’re making with our baseboards, and it’s durable enough to sustain all kinds of wear-and-tear after installation. To attach it to the drywall (not your baseboard), we’d recommend using a can of 847 Spray Adhesive. Apply two light coats of the spray before attaching the bead to the base of the wall.

Architectural L Bead_Flush Baseboard_1

Once you’ve applied your Architectural L Bead to the wall, staple the bead in, using 1/2” staples every six to eight inches along its mud leg.

Architectural L Bead_Flush Baseboard_2

Now you’re in the home stretch and ready to get into the messy work of mudding and painting. Before doing any of this, though, your best bet is to first dry fit your baseboard into the open area left by your spacer to ensure that everything fits correctly. (If you wind up needing to leave a tiny gap in spots between the baseboard and drywall, as seen in the photo below, that’s alright — the mud leg of the L Bead can cover that distance. If you’re left with a gap larger than half an inch, however, you should reinstall your sheet of drywall or recut your baseboard.)

Architectural L Bead_Flush Baseboard_3

Apply as many coats of joint compound to the mud leg of the L Bead as your level of drywall finish calls for. Once that mud’s fully dried, you can start painting your walls and, separately, your baseboards. For example, as you can see below, we went with a sleek black color for the flush baseboard, and a more neutral tone on the wall with bright blue accents. After you’ve permanently screwed your baseboard to the framing, you can enjoy a more hassle-free and more modern choice of trim at the bottoms of your walls.

Architectural L Bead_Flush Baseboard_Hallway 2

Using Architectural L Bead, you can create flush baseboards affordably and easily, even if you’re not yet a pro drywall finisher. Want to get a good look at Architectural L Bead before you buy? Hit the button below and request a free sample!