How to Finish Drywall Around Exposed Beam Ceilings

One of the biggest trends in recent residential construction design is also one of the oldest: exposed beam ceilings. These can either be purely decorative (often using reclaimed wood or something more lightweight, like polyurethane or fiberglass) or a perfect marriage of form and function — supporting the structure while also providing aesthetically stunning ceiling designs.

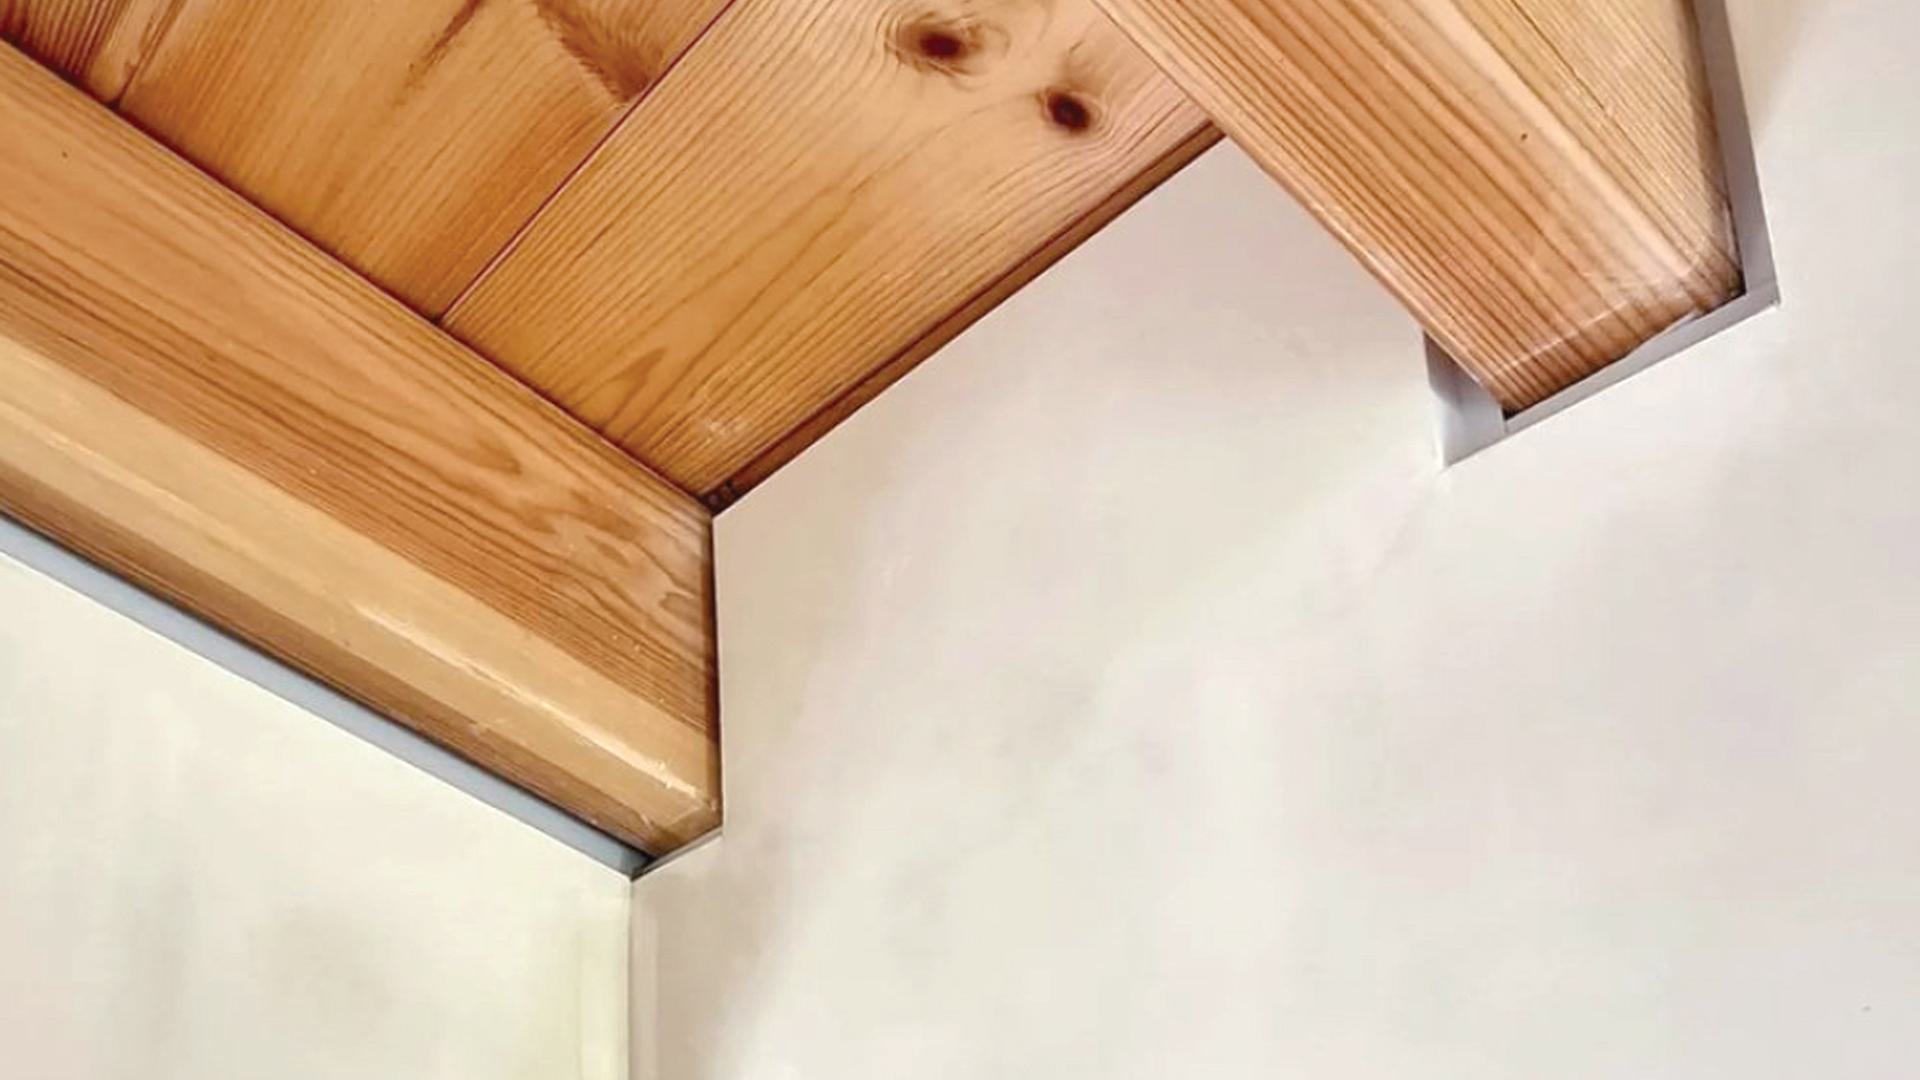
But, unlike the old days when exposed beams were more customary, most homes aren’t purely made of timber, stone and brick anymore. Usually, your exposed beam ceilings — no matter what materials you choose to use for the beams — are also going to interact with drywall, which presents some new challenges where the two materials butt up against each other. Here’s how to easily, seamlessly finish drywall around exposed beam ceilings.

Finishing Around Beams Web vanbaal drywall 2
Finishing Around Beams Web vanbaal drywall 3
Finishing Around Beams Web vanbaal drywall 1
Finishing Around Beams Web prestigeinteriorsolutions 1
Finishing Around Beams Web vanbaal drywall 2
Finishing Around Beams Web vanbaal drywall 3
Finishing Around Beams Web vanbaal drywall 1
Finishing Around Beams Web prestigeinteriorsolutions 1
Above: Images 1-3 courtesy of Ethan Van Baal Drywall. Image 4, and the image featured atop this page, courtesy of Prestige Interior Solutions.

Option 1: Use Vinyl Tear Away Bead for a Clean, Smooth Finish

Ask just about any pro drywall finisher: when it comes to finishing drywall where drywall butts up against another substrate, you cannot get a better finishing accessory than Trim-Tex’s Tear Away L Bead.

There are numerous reasons why you need this bead to finish around exposed beam ceilings. For one, the vinyl materials are flexible, so if your timber isn’t completely straight, the bead can flex around its contours. Secondly, paper tape in these areas is going to cause unsightly cracks over time as the two substrates move slightly; using a Tear Away Bead allow for independent structural movement with no cracking. And, for one more benefit, you’re going to want to avoid any mud spilling over onto your beams — Tear Away Bead’s tear-off strip will protect the beam, and leaves a perfectly smooth finish when you remove it after you’ve mudded and sanded. Check out the video below to see why the guys at Refresh Home Improvements use Tear Away Bead to finish drywall around wood details:

How to Join Different Materials | Trim-Tex Tear Away Beads | Refresh Home Improvements

To install Tear Away L Bead around exposed beams, just make sure you’ve left a slight gap between the drywall and the beam. You’ll fill this gap with Tear Away Bead’s vinyl flange, then attach the bead’s mud legs to the drywall with two coats of 847 Spray Adhesive and half-inch staples every six to eight inches.

As you can see in the below photos from Midwest Drywall, you will need to miter cut each bead at a 45-degree angle to surround every side of every beam where they butt up against your walls. And if your ceiling is also drywall, another Tear Away Bead will need to be installed running along each side of the beam. But the extra effort is worth it — once you’re done, you’ll have a gorgeous exposed beam ceiling design with a gorgeous drywall finish that will last for the long haul.

Finishing Around Beams Web midwestdrywalls 1
Finishing Around Beams Web midwestdrywalls 4
Finishing Around Beams Web midwestdrywalls 3
Finishing Around Beams Web midwestdrywalls 5
Finishing Around Beams Web midwestdrywalls 2
Finishing Around Beams Web midwestdrywalls 1
Finishing Around Beams Web midwestdrywalls 4
Finishing Around Beams Web midwestdrywalls 3
Finishing Around Beams Web midwestdrywalls 5
Finishing Around Beams Web midwestdrywalls 2
Above: Images courtesy of Midwest Drywall, Inc.

Option 2: Go Big with a Shadow Effect

But maybe having clean lines and crisp edges isn’t enough for some clients — maybe they want their drywall work to be just as memorable as their exposed beams. To go above and beyond where drywall meets exposed ceiling beams, pick up a box of Architectural Z Shadow Bead and get to work creating eye-catching shadow effects in these areas.

Finishing Around Beams Web antonistiniakos drywall 3
Above/below: Images courtesy of Antonis Tiniakos Drywall.

To achieve this look, you will need to leave gaps between the drywall and the adjoining substate large enough to fit whichever size Z Shadow Bead you select. Like with Tear Away Bead, you will need to miter cut your beads at 45-degree angles to wrap around your beam details. (Learn more about how to accomplish these often-tricky cuts with Z Shadow Bead here.) And then, once again, install the bead using 847 Spray Adhesive and half-inch staples before mudding.

These shadow effects on exposed beams aren’t always just decorative, though. Check out this project from drywall pro Antonis Tiniakos, where form and function came together. About this project, Antonis says: “Drywall partitions were built in this attic. Due to the fact that the wooden ceiling is exposed, it was necessary to use an Architectural Shadow Bead to connect the wall and ceiling, so that the paint could be cut properly but also to avoid unwanted cracks. The placement of the Shadow Bead is a demanding but necessary job, but the result is satisfactory.”

Finishing Around Beams Web antonistiniakos drywall 1
Finishing Around Beams Web antonistiniakos drywall 2
Finishing Around Beams Web antonistiniakos drywall 4
Finishing Around Beams Web antonistiniakos drywall 5
Finishing Around Beams Web antonistiniakos drywall 6
Finishing Around Beams Web antonistiniakos drywall 1
Finishing Around Beams Web antonistiniakos drywall 2
Finishing Around Beams Web antonistiniakos drywall 4
Finishing Around Beams Web antonistiniakos drywall 5
Finishing Around Beams Web antonistiniakos drywall 6

How do you choose to finish drywall around exposed beam ceilings? We love seeing Trim-Tex solutions in action — like the real contractors featured all over this story and in the photo gallery below — and we’d love to see your work! Tag our page on Instagram or use #trimtex_drywall with pictures of your next project and show off your drywall work to the world!