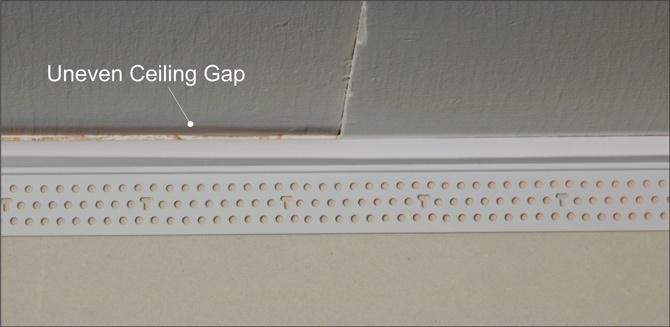
Uneven ceilings may cause gaps between the Deflection Bead gasket and ceiling. In the below image, Deflection Bead was not pushed tightly against the ceiling resulting in an unsightly gap. The gap can be caulked but following the steps below will eliminate this unnecessary step while also saving on time and labor.
Installing Deflection Bead to Eliminate Gaps in Uneven Ceilings

INSTALLING DEFLECTION BEAD
For a slightly uneven ceiling (up to 1/8”), press the Deflection Bead up so there is no gap at the ceiling. Install the bead with 847 Spray Adhesive and staple the mud legs with 1/2” staples every 6-8”. Apply mud compound and prior to the final sanding remove the tear off strip for a clean and crisp finish.
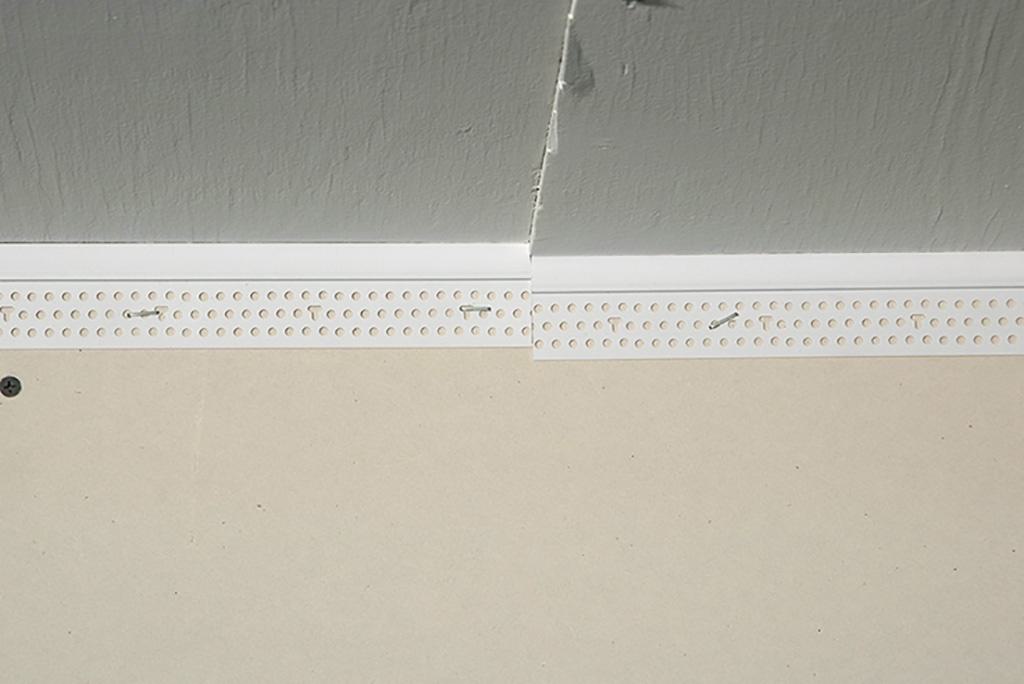
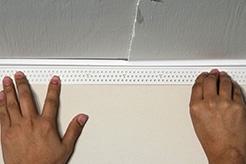
For a large gap as shown, the preferred method would be to cut the Deflection Bead into two pieces and install them separately. Snip the bead to the desired length and install both pieces up against the ceiling so there is no gap. Spray and staple the bead into place as shown in Figure 2. This will allow both pieces of Deflection Bead to fully expand and collapse.
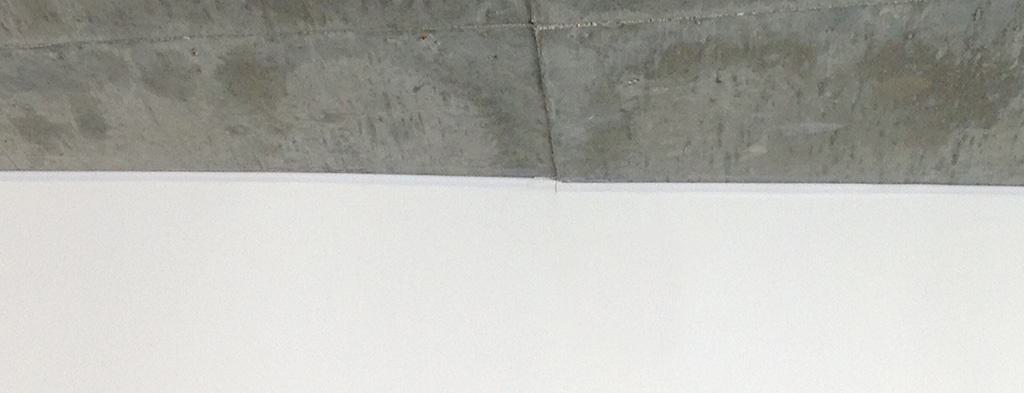
Deflection Bead provides protection for up to 7\16” of deflection and leaves a clean finished edge with the tear off strip.
Find Deflection Bead at a dealer near you by using the tool below!
Find Your Local Dealer
Trim-Tex beads are flying off the shelves at a dealer near you. Snag a box or a truckload of your favorite corner profiles today.