Answering All Your Z Shadow Bead Questions

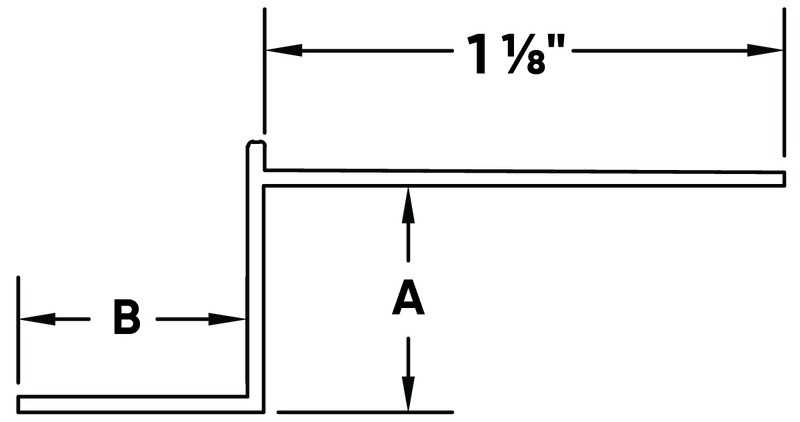
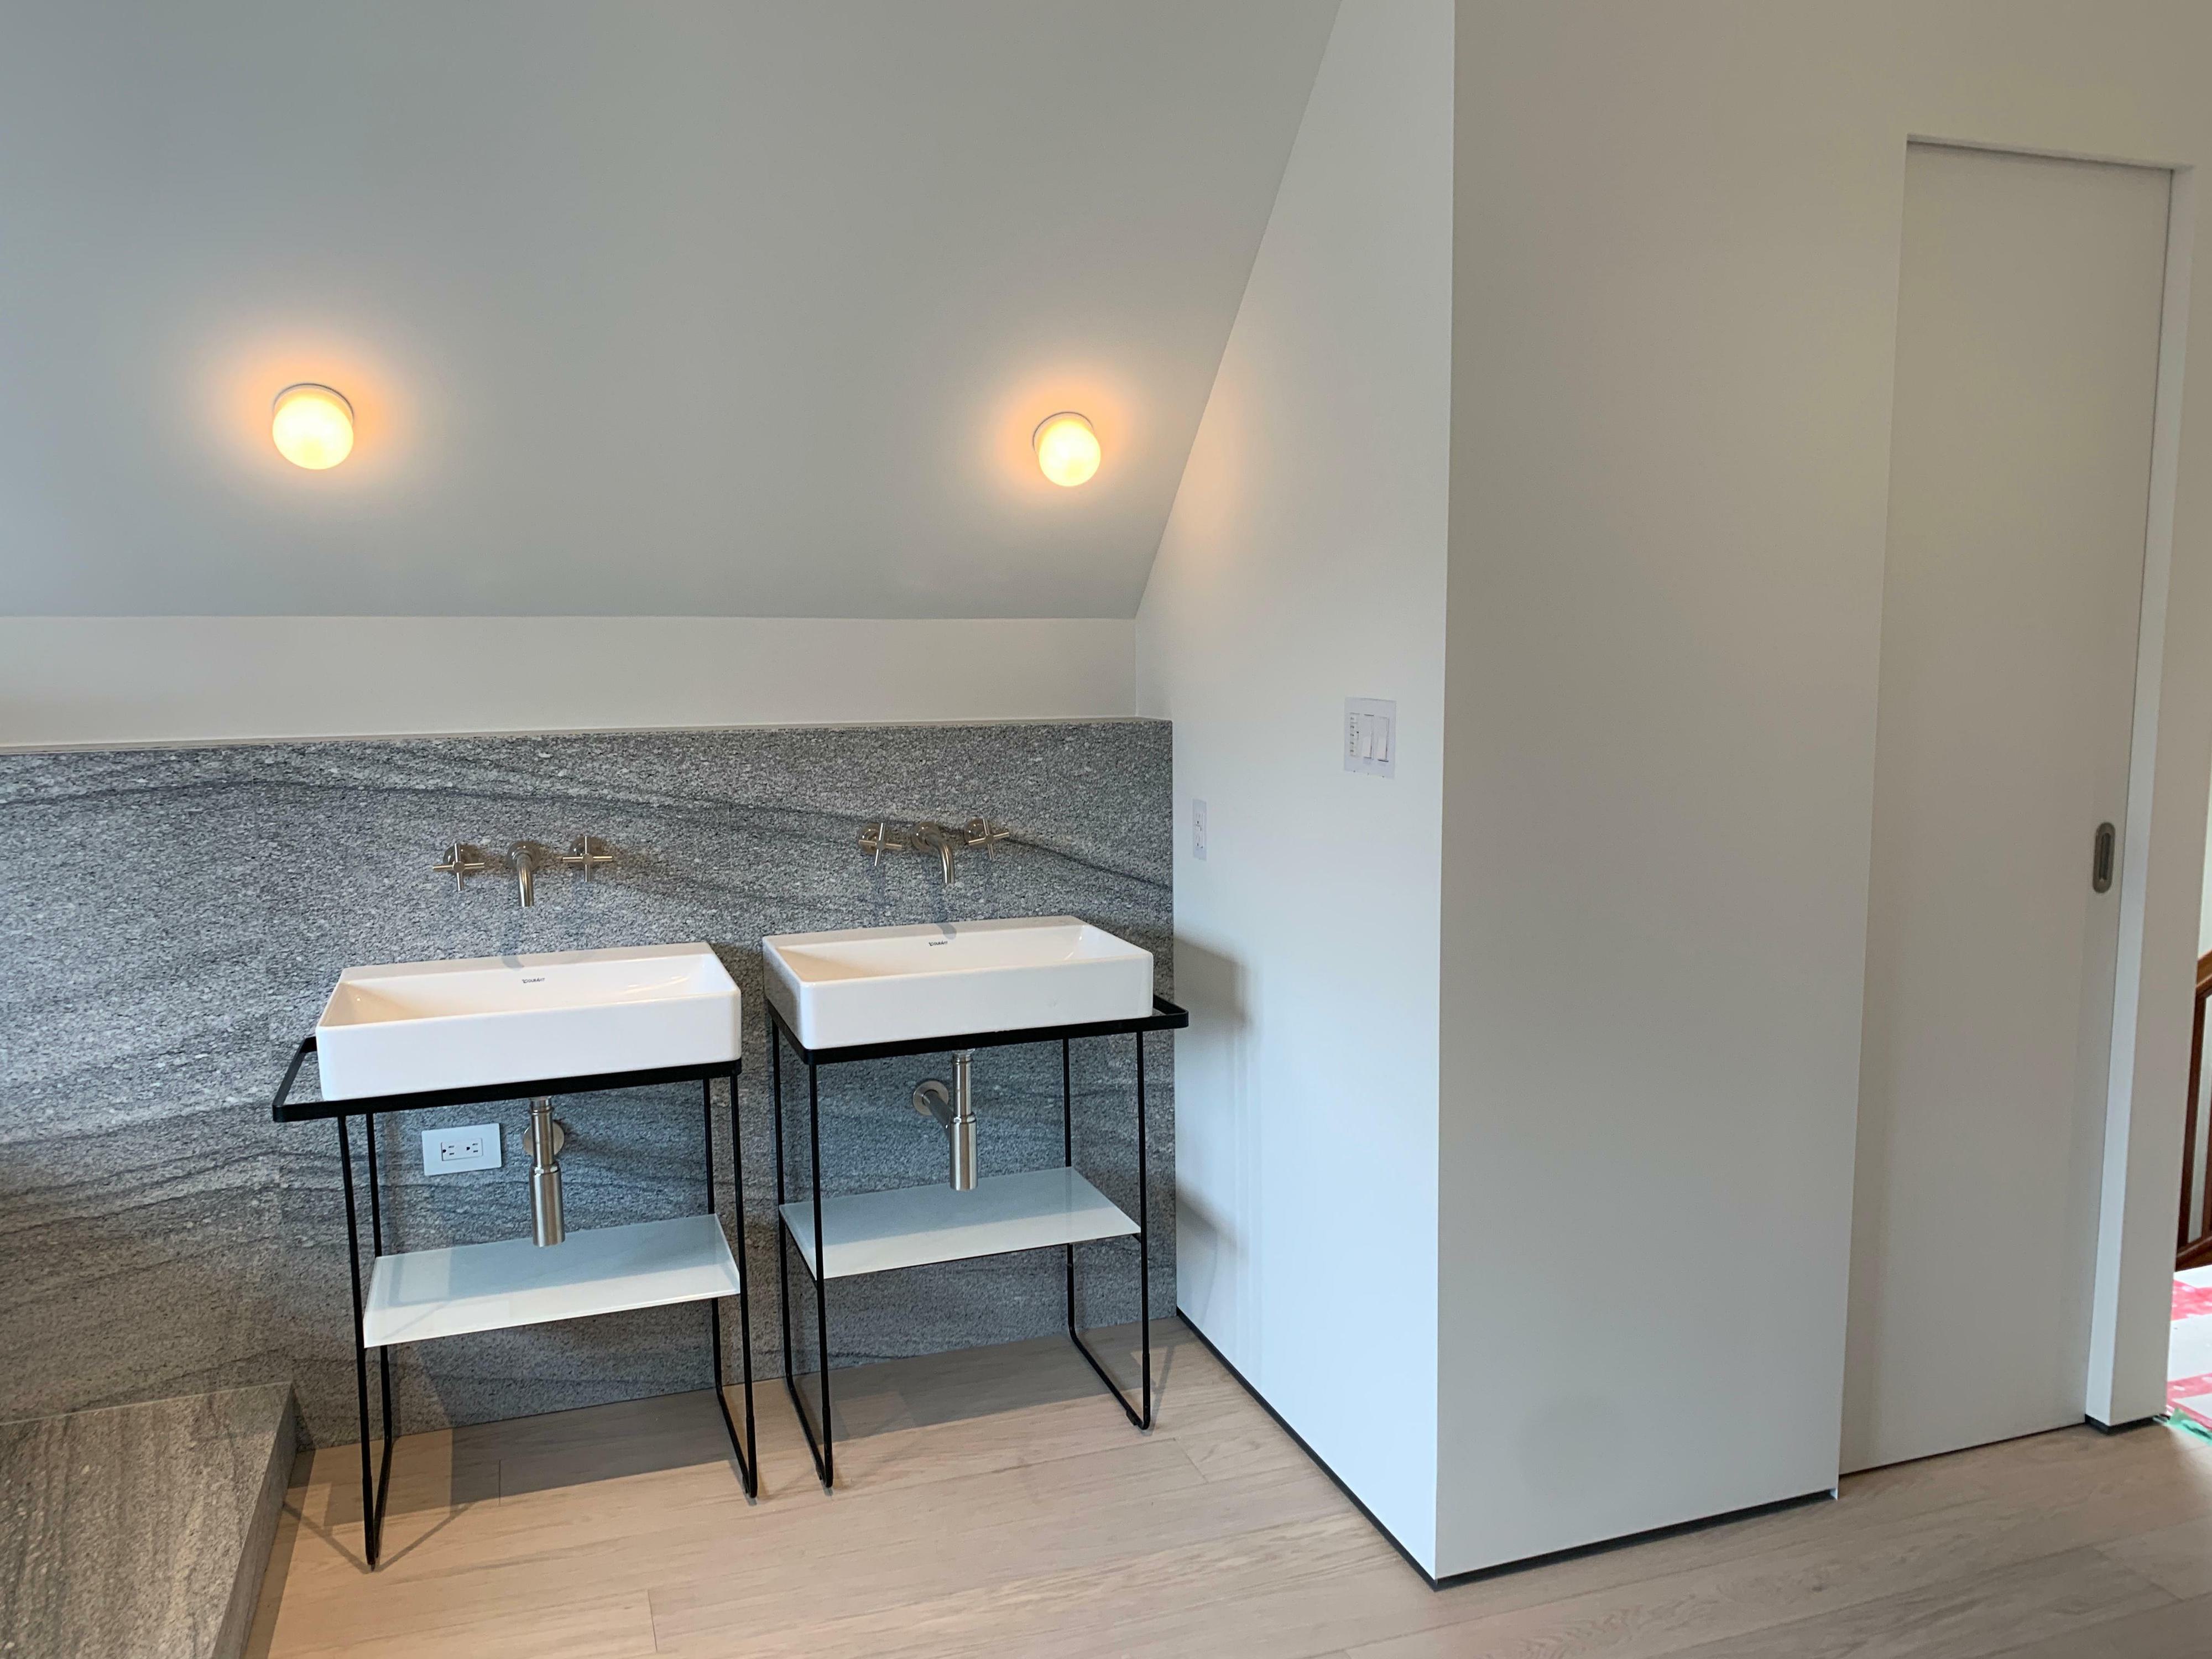
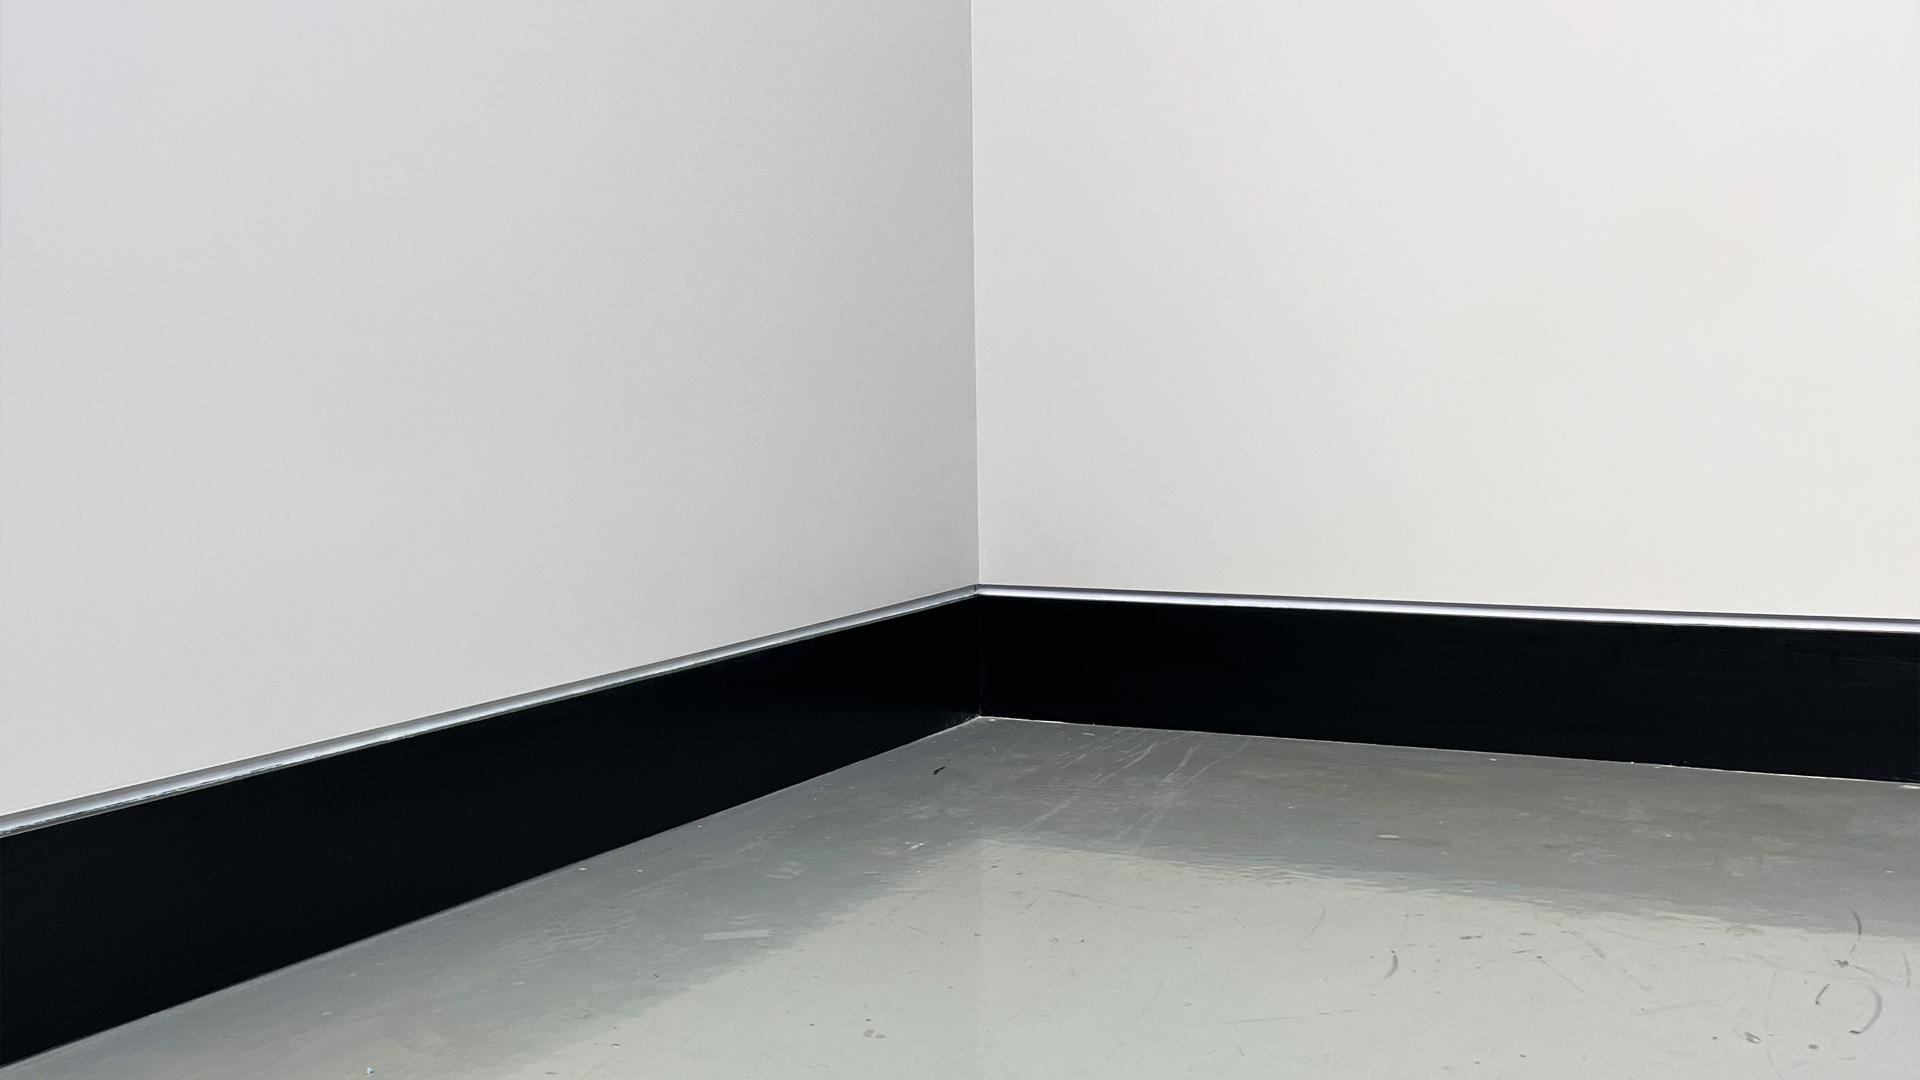
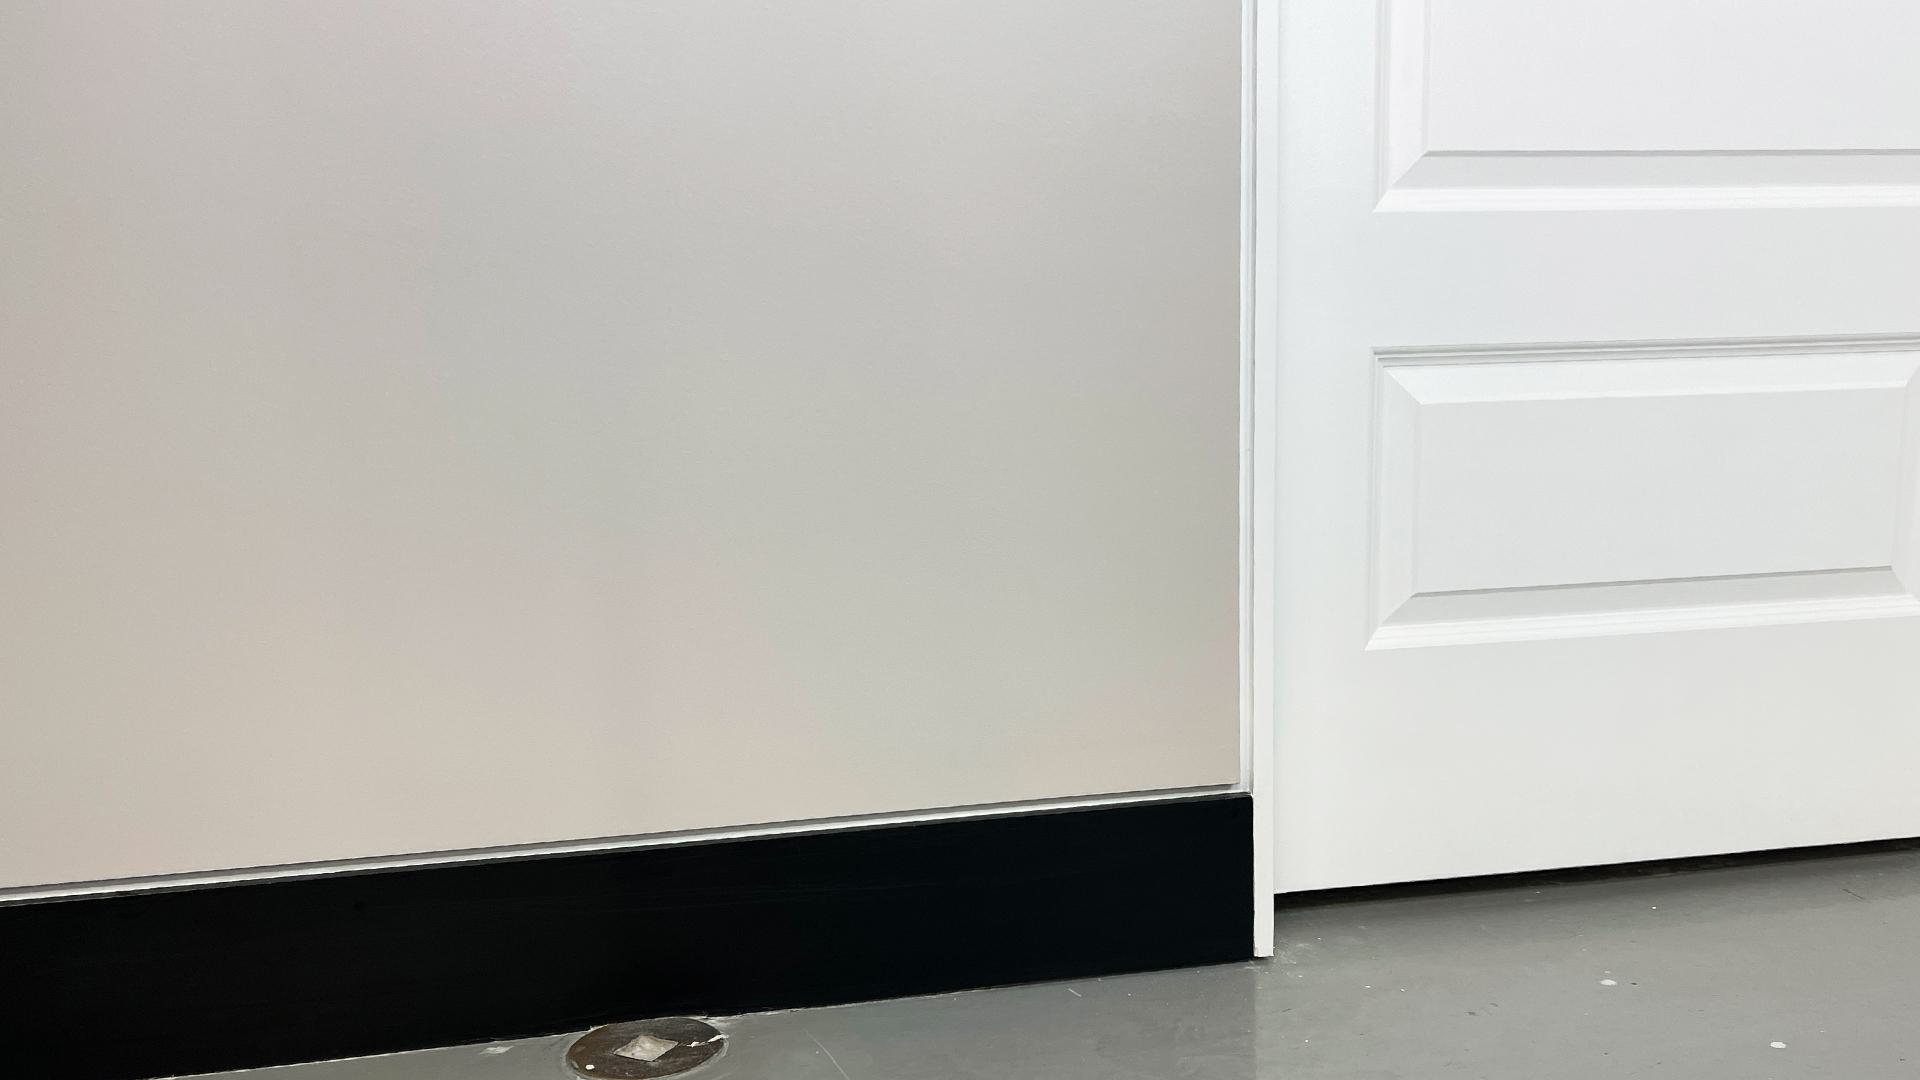
When most tradespeople think of vinyl drywall accessories, they’re usually just thinking about simple ways to protect your corners. But there’s so much more out there that can ignite your creativity to create something extraordinary and eye-catching, using nothing more than drywall, vinyl beads and a little imagination. One bead that really seems to inspire finishers to create something unique is Trim-Tex’s Architectural Z Shadow Bead — we know because drywallers are calling our customer service team every single day, trying to learn how they can execute their own versions of the elegant designs they’ve seen pulled off using this dynamic vinyl solution.

To help our excellent customer service team out a little, we took the most common questions they receive, and we’ll answer all of them here to help you use Z Shadow Bead to get creative with your drywall design. Let’s start with the most obvious one…

What is Z Shadow Bead?

Z Shadow Bead is a vinyl accessory that allow you to create a reveal effect on the edge of drywall where it butts up against other elements of a space, like base trim, ceilings, door frames, windows, et cetera. Its mud leg and two rigid vinyl flanges form a zig-zagged shape that gives the bead its name and gives you a cleaner, easier way to create recessed edges that add minimalist flair to any room.

Z Shadow Bead Project Installation 2
Architectural Z Shadow Bead Installation Animation

How do I install Z Shadow Bead?

Installing Z Shadow Bead isn’t hard, but it does require a good bit of planning. Dry fit everything before you hang your drywall or install the bead. Depending on which size bead you choose (as depicted below, its “A” size corresponds to the thickness of the drywall you’re using, and its “B” size is the size of the reveal effect, all of which you’ll find listed on this product's webpage), you’ll need to leave a certain amount of distance between the edge of your drywall sheet and the architectural component you’re butting the bead up against, anywhere between ¼” and ¾”.

Architectural Z Shadow Bead Tech Spec R2

You’ll then need to insert the bead’s vinyl flanges within that gap you’ve created. Then install it as you would almost any other vinyl drywall bead: spray it with two coats of 847 Spray Adhesive and press the bead firmly into place along its mud leg. Then staple it in every six to eight inches using half-inch staples, and finish with mud. 

How to Finish a Trimless Pocket Door - finished - sinks

If I’m installing Z Shadow Bead at the bottom of my wall instead of baseboard, do the floors go in first or the wall?

You can do it either way! If the ground is uneven at all, however, we’d recommend installing the flooring first before anything else to avoid an inconsistent reveal effect.

Z Shadow Bead Project Installation 3

If I’m installing Z Shadow Bead above flush baseboards, should I install my base trim or my drywall first?

There are many ways to do this, but here's what we recommend for perfect installation with minimal hassle. Getting this kind of design to look seamless is tough, but absolutely worth the effort. First, install flooring if your ground is slightly uneven, then install your drywall, leaving enough room for both your base trim and the reveal effect. To do that, we’d recommend temporarily screwing in a bit of scrap drywall where your baseboards would go. After the drywall is hung, remove the spacer, install your Z Shadow Bead, then finish the bead with mud. Paint your walls and, if you want, your trim. Only after all that’s done, install your baseboards.

Learn more about how to execute this baseboard reveal design here.

Z Shadow Bead Project Finished 4

What’s the difference between Z Shadow Bead and F Reveal Bead?

F Reveal Bead is nearly the same as Z Shadow Bead, but with an added flange that caps off the profile, forming an “F” shape. With that extra flange, F Reveal Bead creates the strongest reveal detail when butting up against finished/non-drywall components like door jambs and windows — sometimes Z Shadow Bead may require backing behind it to match this kind of strength.

So should I use F Reveal Bead or Z Shadow Bead around windows and doors?

Both have their advantages! While F Reveal Bead creates a stronger reveal, if your framing’s not perfectly straight, it can result in slight inconsistencies. Z Shadow Bead is a little more forgiving when windows/door frames aren’t totally even.

Z Shadow Bead Project Finished 5

Why have I heard Z Shadow Bead sometimes be referred to as a “reglet”?

Though this term has its origin as a specific product, it’s now become a common industry term used for reveals in general. Z Shadow Bead is Trim-Tex’s own solution — accept no substitutes!

Z Shadow Bead Project Installation 1

How do I miter cut Z Shadow Bead?

We understand that this bead’s unusual shape makes it tricky for mitering it on an angle! But the solution is simple enough: take a small piece of scrap drywall — use ½” drywall for a ½” “B”-sized Z Shadow Bead, et cetera — and carefully hold it (far away from the miter saw’s blade, of course) behind the bead’s mud leg, as pictured above. This way, you’ll have an even width that won’t bend as you cut it.

To cut for an intersection at an inside corner, position the bead vertically with the mud leg facing up, and o cut for a horizontal to vertical joint, lay the bead horizontally against the miter's base plate.

Z Shadow Bead Project Installation 4

The rest of my wall isn’t white — can I paint Z Shadow Bead to blend in?

Yes! The bead’s vinyl flanges are 100 percent paintable. Personally, we find it easier to paint the bead your desired color before installing it, but you can do it while painting the rest of your wall if you’d like as well.

I don’t want to paint my reveal detail. How can I mask/protect it from mud and paint?

This is a common problem, with a simple solution. Rather than use masking tape that can easily fall into the gap of the reveal detail, before you start mudding, insert a length of rope into that gap. Then, when you’re done mudding and/or painting, rip out that rope for a satisfying finish. Check out White Hawk Drywall demonstrating this “rope trick” with a long run of Architectural Reveal Bead below:


Now that you know just about everything there is to know about Z Shadow Bead, all that's left to do is to get a look at it for yourself. Fill out the form below to request a free sample of this popular bead!