To add a dash of flavor to each of your drywall corners, it’s tough to beat the sharp lines and stark shadows of Chamfer Bead. A chamfered edge can subtly soften a room, elevating it above your everyday expectations. Chamfer Bead does present one small problem for finishers, though: when it crosses paths with 90-degree baseboards, you’re going to need a method to seamlessly unite the two profiles. For our money, here are the two best ways to finish Chamfer Bead at baseboards — there’s the hard way, which is time-consuming but can look fantastic, and there’s the easy way, using Trim-Tex’s Chamfer adapters for a faster, flawless transition.
2 Ways to Finish Chamfer Bead at Baseboards

THE HARD WAY: DIY CHAMFERED BASEBOARDS
The more labor-intensive option here is to not transition your Chamfer Bead into your baseboards at all, and to instead cut all your baseboards to have their own chamfered edge. This will require a good miter saw, some wood glue, some caulk and plenty of nails (plus, more likely than not, a few tries at bat before getting your cuts exactly right).
Again, to pull off this look for each and every one of your corners, you will probably need more time than most drywall finishing crews ever get in a day, not to mention some carpentry know-how. In the case of this custom home we visited in Omaha, Neb., the baseboards are being crafted by an expert trim carpenter, Jason Mollak. Jason isn’t just a pro at this stuff — he’s also the president of JPM Construction Inc., the contracting company behind this house.
Oh, and did we mention this Omaha house will also be Jason’s own personal dream home? So, if he wants to take the time to finish every last detail of this house exactly the way he and his pro interior designer wife Lindsay want to, we say more power to them!
Before beginning this process, you will need to have fully installed and mudded your Chamfer corner into place so you can form your custom baseboards around it. (Jason used the larger 1⅛" version of Chamfer Bead for his house.) To achieve this look, measure and use a miter saw to cut your baseboards with a 22.5-degree angle on each side of your trim.
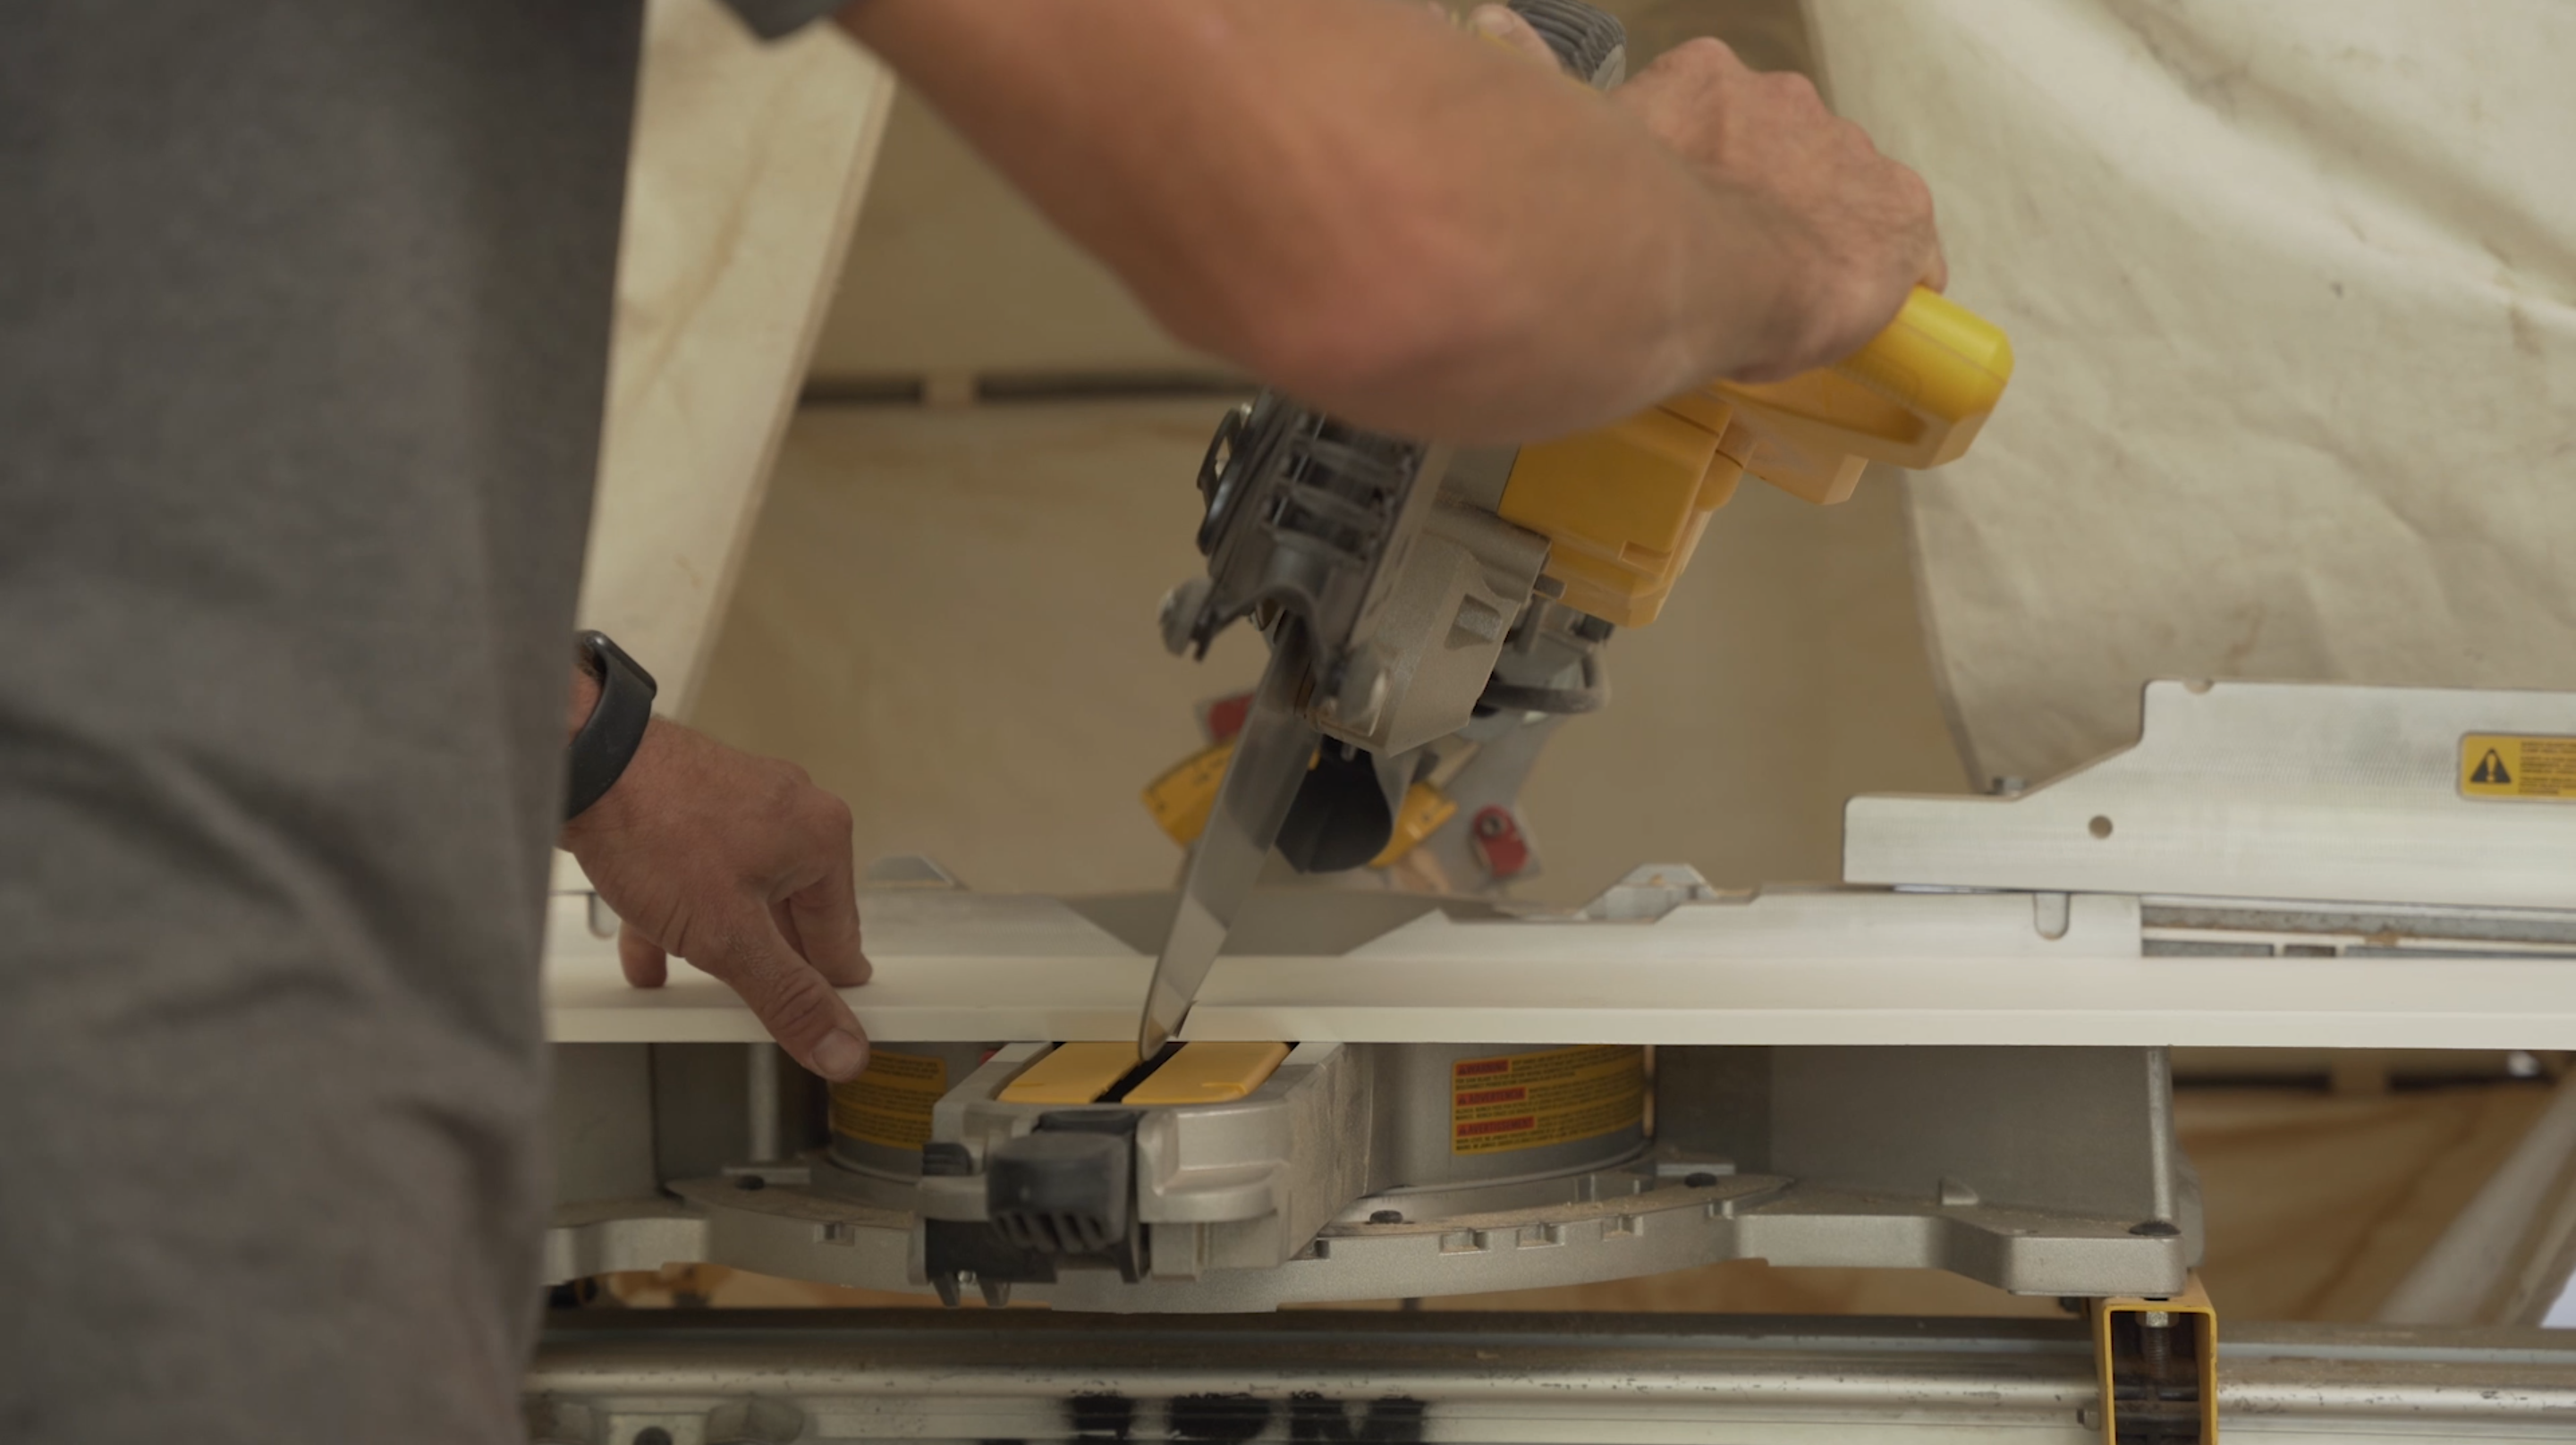
Take a scrap piece of baseboard, if you’ve got one, and use your miter saw again to cut a small piece of wood down to size with matching 22.5-degree angles on either side, with the larger end of the block measuring around 1½” wide (your mileage may vary slightly here depending on how you installed your trim, so be sure to measure the gap you’re filling before making any cuts). Dry fit the block into the opening, and if you’ve got your angles right, apply some wood glue and insert it into the gap. Get your nail gun and affix the block and baseboards permanently into place.
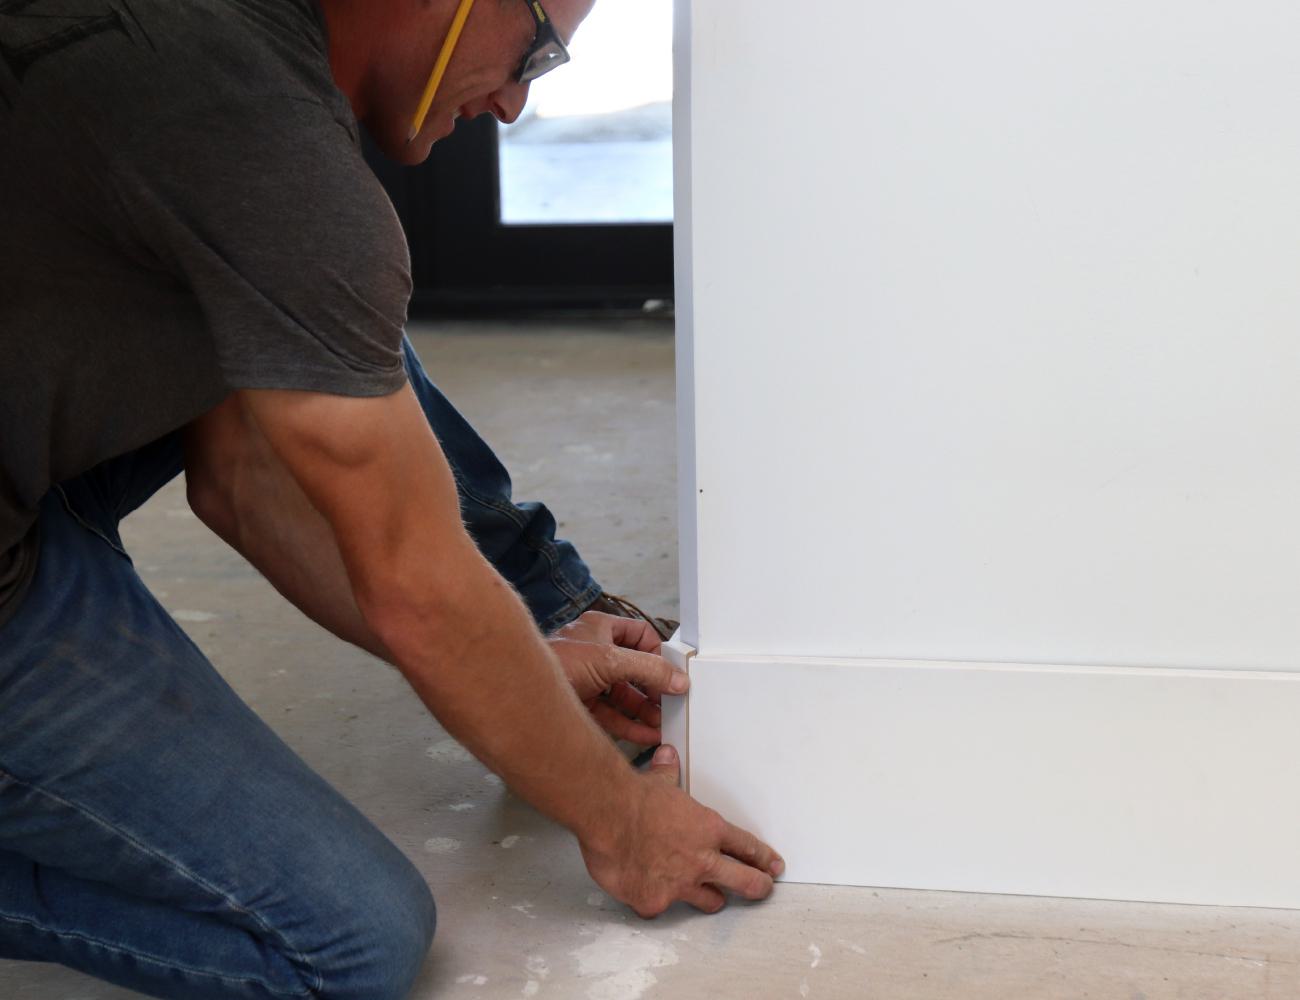
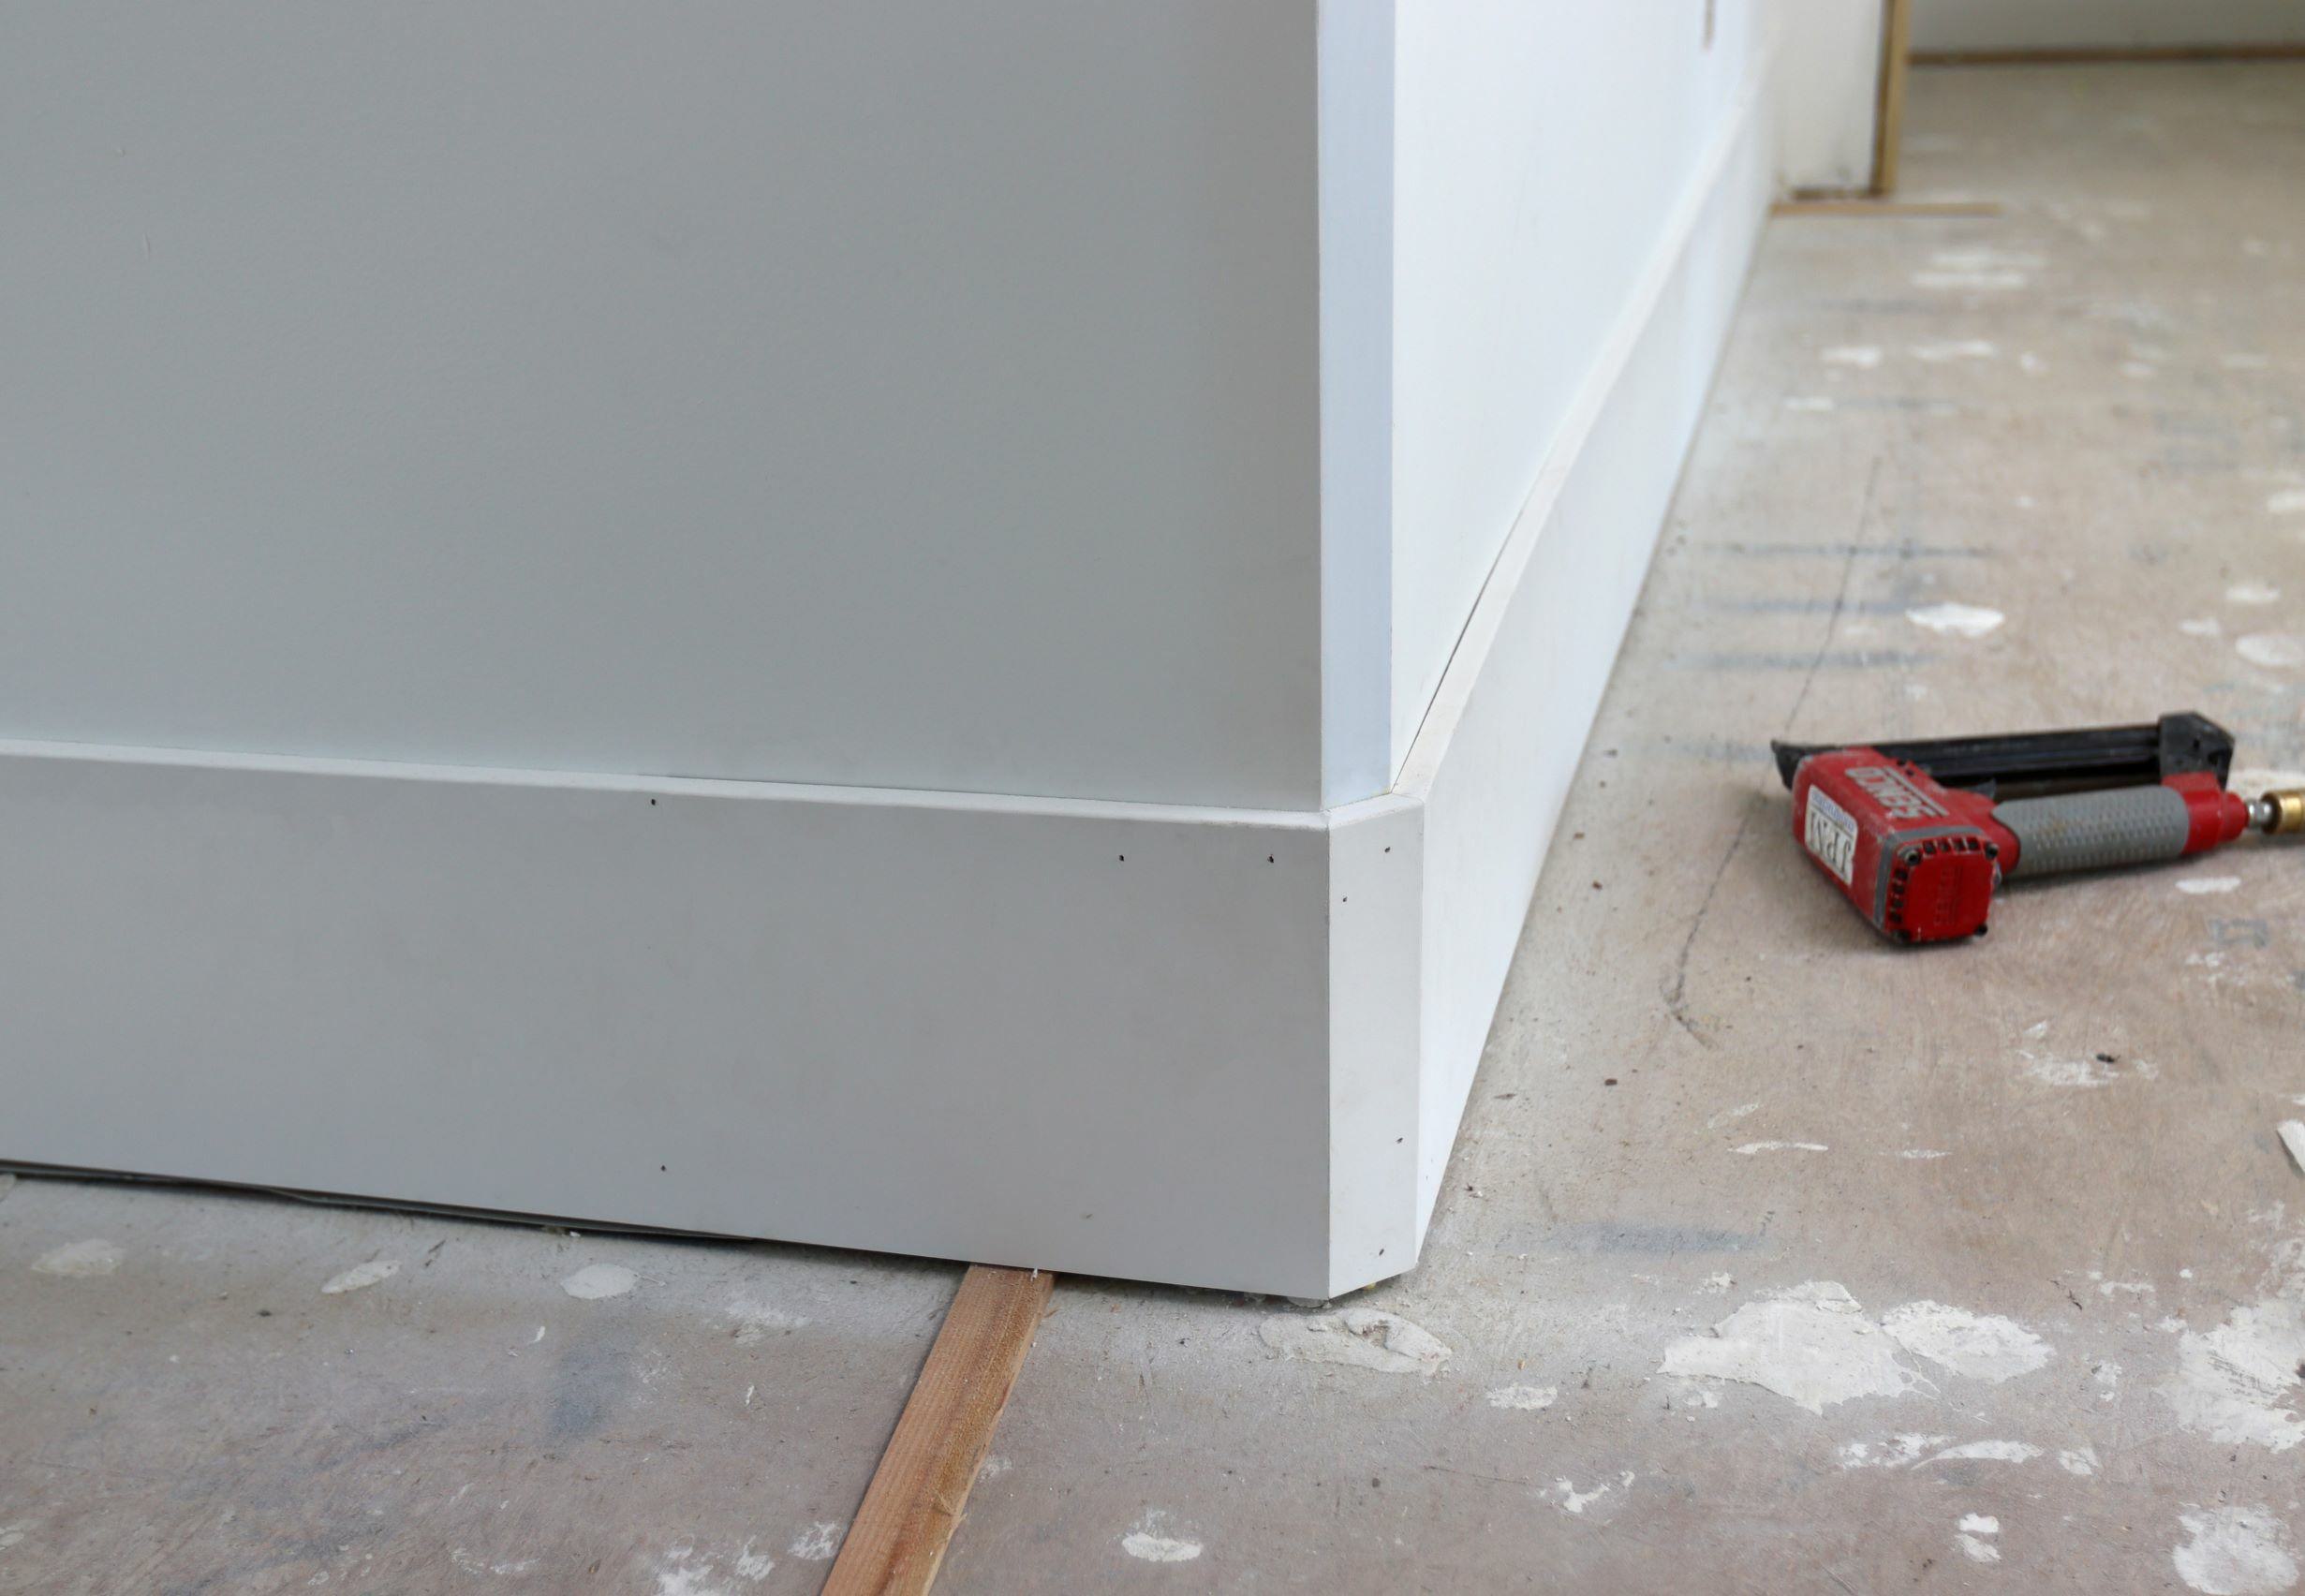
From here, it’s a matter of cleaning up the chamfered baseboard design as needed. For his baseboards, Jason dabbed looser sections of the joints with caulk, and made just one small shaving with a razor blade to get a flawless finish. Your chamfered baseboards and walls are now all set to start painting. And Jason's hard work here has paid off — his chamfered baseboards look incredible.
THE EASY WAY: TRANSITION YOUR BEADS WITH CHAMFER ADAPTERS
The far simpler and, in the end, far more cost-effective of the two ways to finish Chamfer Bead at baseboards is to use a popular item we distribute here at Trim-Tex: an adapter that allows you to transition between a chamfered corner and 90-degree baseboards quickly and easily.
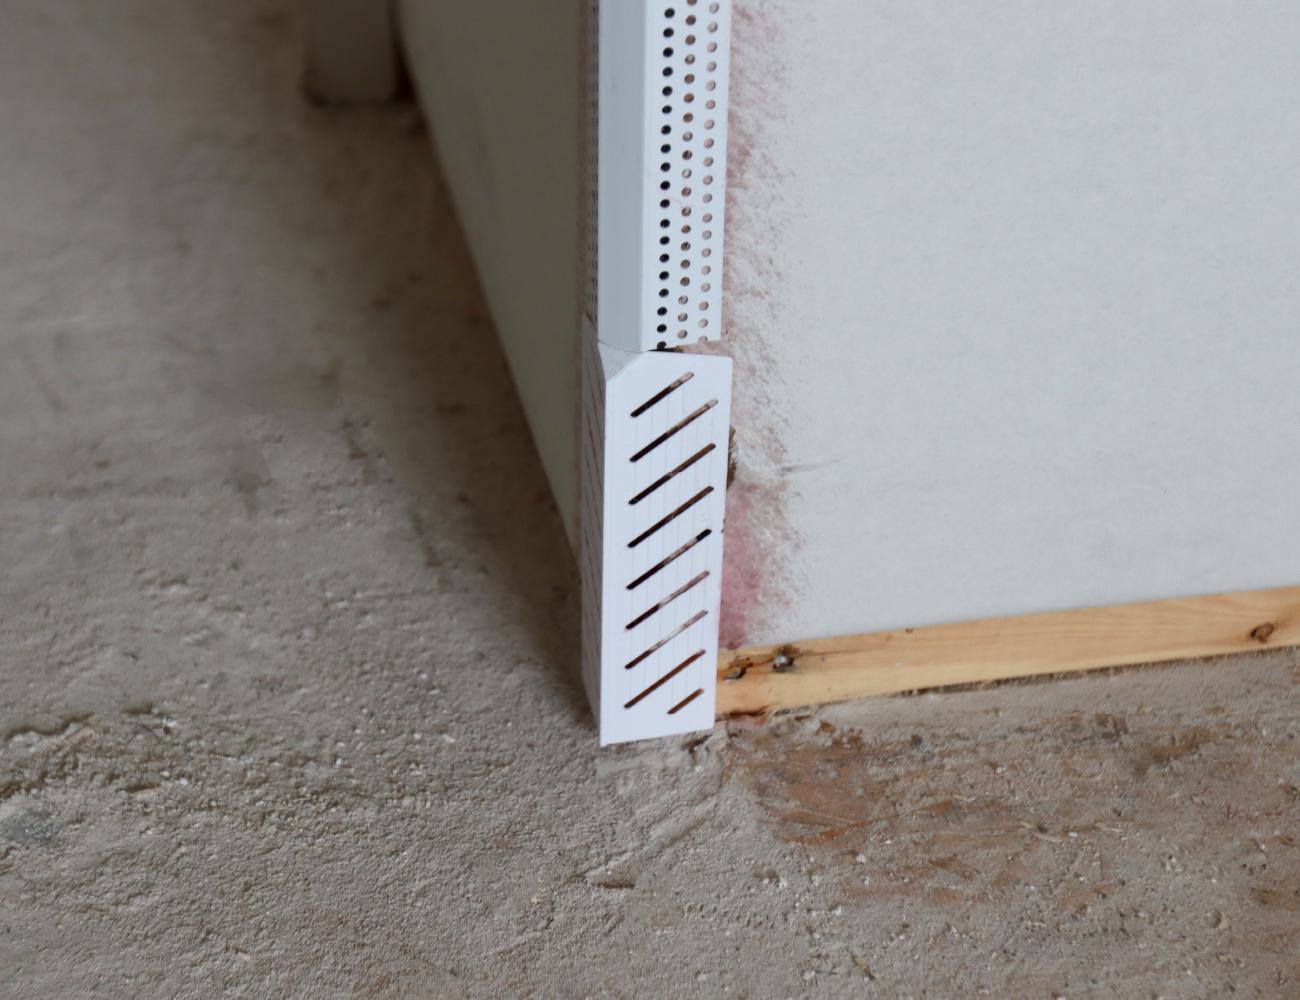
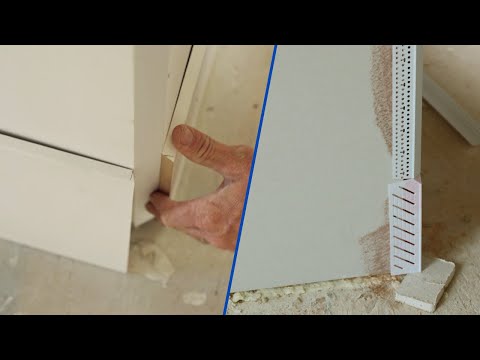
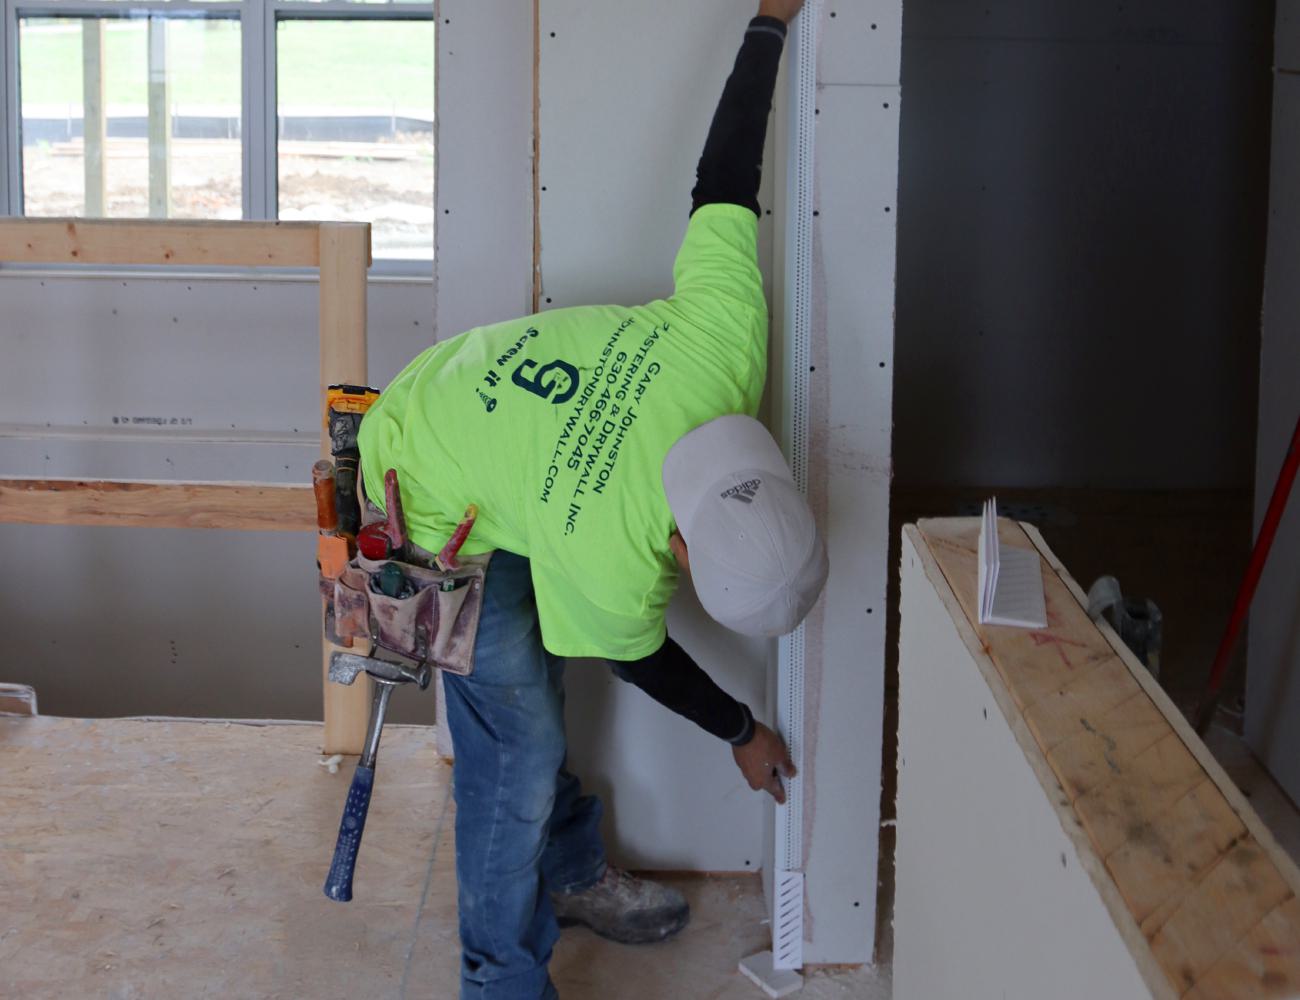
All you’ll need here are the same tools you’d use for installing any standard vinyl corner bead, which are a can of 847 Spray Adhesive and a staple gun loaded with half-inch staples. For this method — as you’ll see the pictured finishing crew from Gary Johnston Plastering & Drywall do at a home build in Plainfield, Ill., we recently visited — you will want to install your adapters before the Chamfer Bead along your corners. (The Gary Johnston crew here is using the smaller 350 Chamfer Bead and the 350 Adapter for this house, but we have adapters for the larger Chamfer Bead available as well.) Be sure to leave the proper amount of room at the bottom of each wall below the adapters; to get the measurement right, in most cases, you can rest the adapter on top of a scrap piece of drywall.
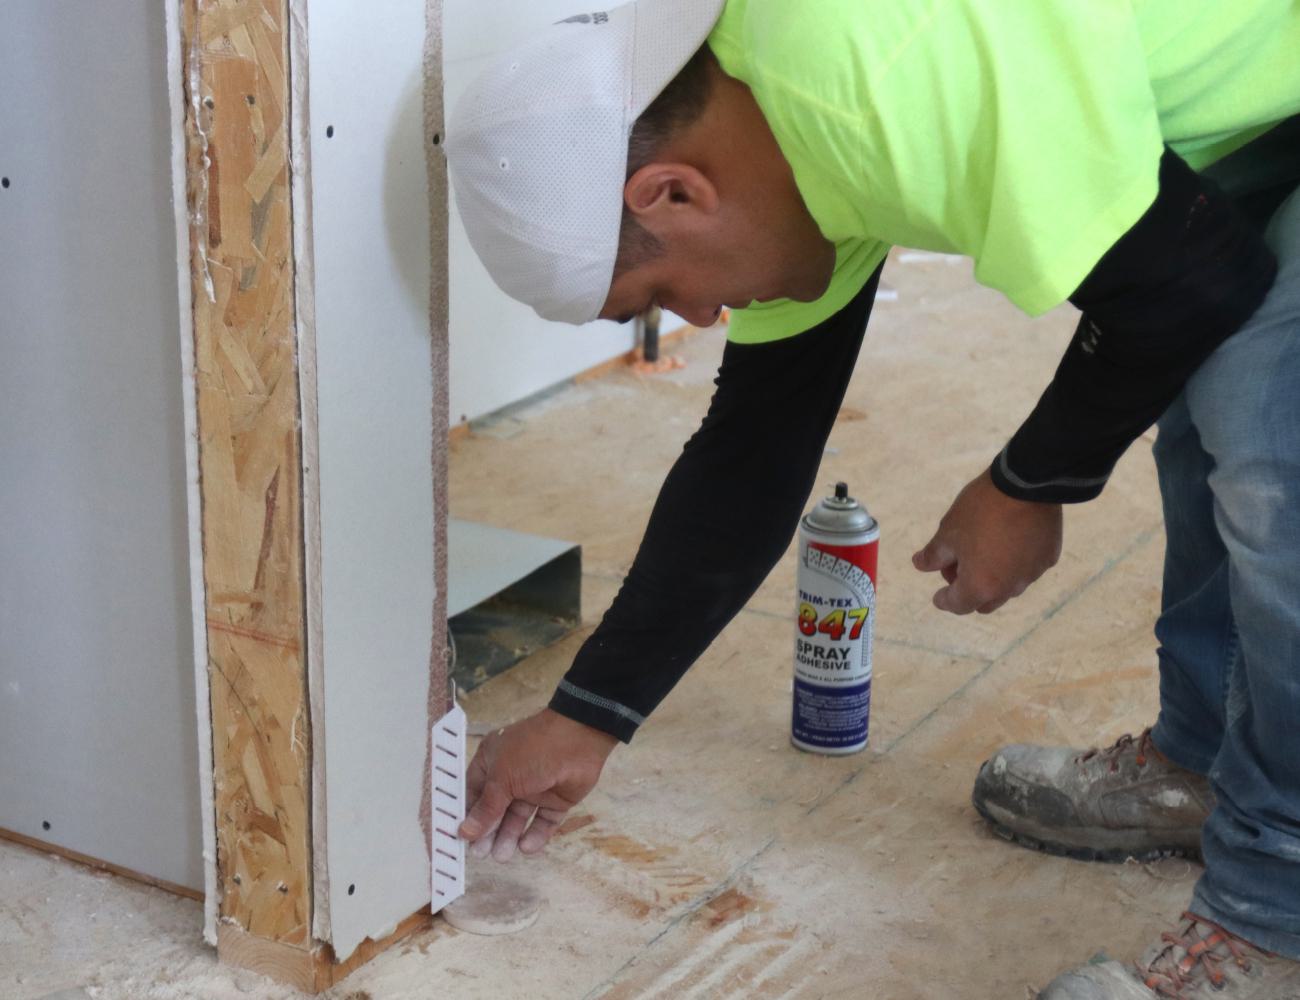
Now just install your adapter with a light spray of 847 Adhesive on both the vinyl accessory and the drywall, then staple it into place. (Note: the pictures and video featured here from Plainfield do not include staples on the bead or adapter, but rest assured, they were applied at a later time after our visit to the jobsite.) When you’re installing your Chamfer corner bead using these same methods, the bead will overlap with the small tab sticking out the top of the adapter.
Apply two to three layers of mud to the entire corner, and that’s all there is to it. Once you’re done, you’ll have a soft, chamfered corner that flawlessly transitions into a sharp, 90-degree one. Drywall finishing is by no means an easy trade, but when discussing the ways to finish Chamfer Bead at baseboards, it doesn’t get much simpler than this method.
Follow along with Jason Mollak’s beautiful custom home build in Omaha by getting all the updates from his dedicated Instagram page for the project, Living on Skyline, or by reading all the articles about its progress over on Fine Homebuilding. And if you’re constructing a home in the southwest Chicagoland area and need a top-notch finishing crew, you’d do well to contact Gary Johnston Plastering & Drywall.
Finally, the team at Trim-Tex is constantly posting videos, tips and tricks like this that you don’t want to miss — be sure to subscribe to our monthly newsletter by hitting the button below!

Trim-Tex in Your Inbox
Subscribe to our e-newsletter for monthly tips, news, case studies and updates