A slightly different finish on an otherwise everyday room fixture can sometimes make a major impact. Doorways are great examples of this — many expect a doorway to only look one way, generally speaking, with the same basic door casing fitted around its edges. This presents crafty finishers with an opportunity to upend those expectations. You don’t need to go so far as to paint a door bright red for it to stand out — a distinctive finish can subtly take a space to that next level. While there are any number of ways to accomplish this, today we’re talking about one of our favorite methods, showing you how to create a trimless door with Architectural Z Shadow Bead.
Create a Trimless Door with Architectural Z Shadow Bead

The trimless door has become a popular choice among finishers because it’s clean, modern and eye-catching, without drawing too much attention to itself. It communicates that you (or your client) value creativity and uniqueness, but aren’t a showboat about it.
Plus, anyone who notices your trimless door probably wouldn’t guess that, using our method, you also didn’t spend much time, effort or money pulling it all off. It just requires some pre-planning, which we can help you with here.
Whether you’re installing your trimless doors with a miter saw or just a pair of snips, follow these simple guidelines for best results.
PREPPING YOUR DOOR
Install your door frame prior to hanging your drywall for accurate measurements. You’ll want to ensure that the door jamb you’re using is the overall width of the wall and drywall thickness combined.
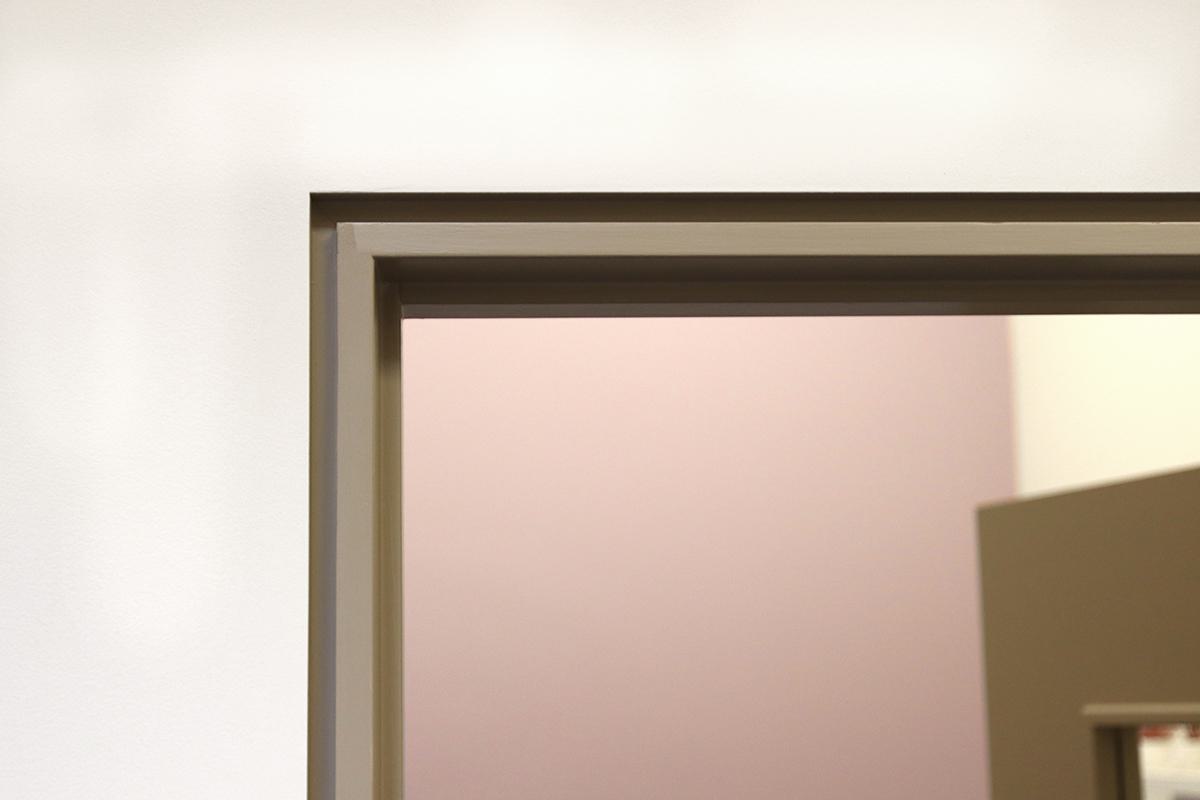
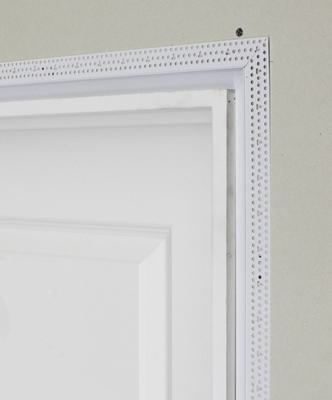
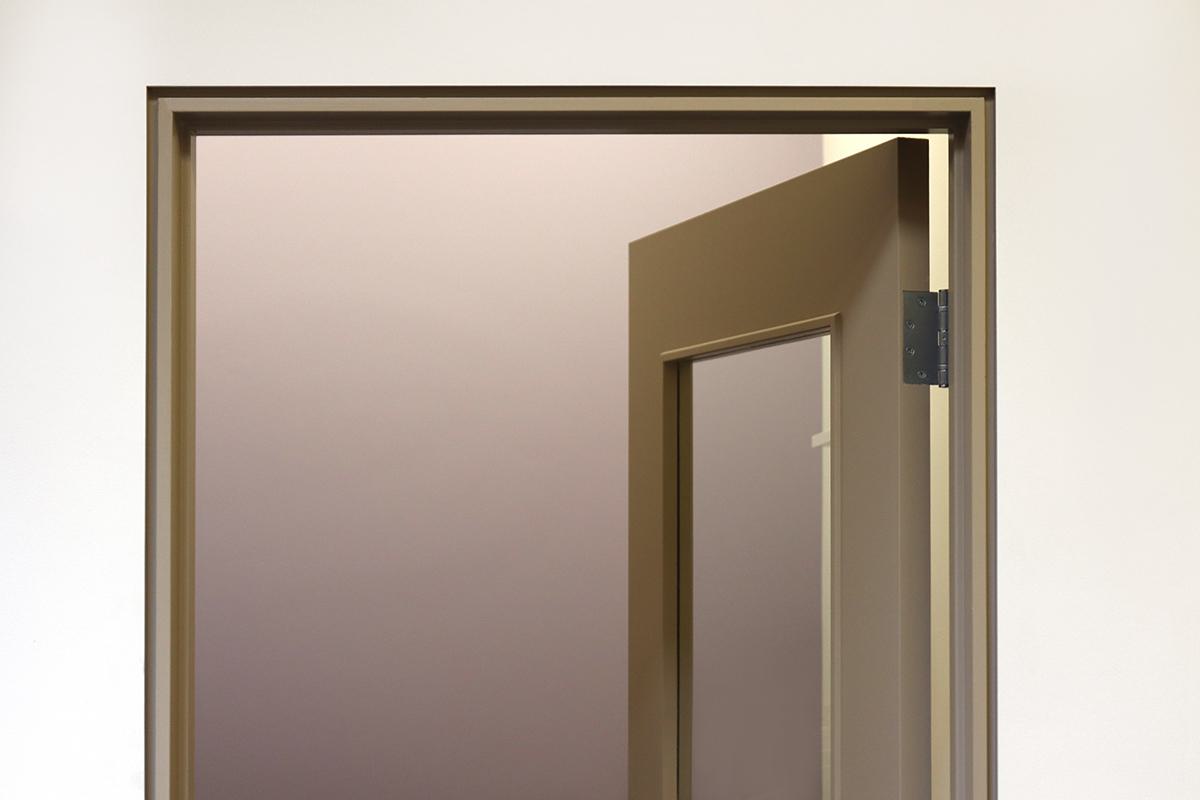
When you’re ready to start hanging, to pull off this trimless door look, you will have to include a certain amount of setback from the edge of the drywall to the door jamb to accommodate the Z Shadow Bead. The amount of space left here depends on the size of the Z Shadow Bead you choose — there are 11 versions of the bead available, all of which are listed on the product overview on the Trim-Tex website, where you’d consult the “B” size of the version you end up using. The gap you leave here must be 1/8" wider than the overall width of that “B” size of the Architectural Z Shadow Bead. (In the trimless door we finished this way, pictured at the top of this article, we used the 5/8” x 3/8” version of the bead.)
Now that you’ve prepped your doorway, it’s time to cut your bead down to size to create a trimless door with Architectural Z Shadow Bead, and there are a couple ways to go about doing that.
USING A MITER SAW
Just cutting right into this vinyl bead with a miter saw will often cause it to bend, leaving you with an inaccurate angle. Instead, we’d recommend grabbing a scrap piece of drywall the same thickness of the bead and slotting that into the bead’s profile to support the Architectural Z Shadow Bead when cutting with a miter saw. Make sure that the miter saw has a fine-tooth blade (100-plus teeth) before beginning.
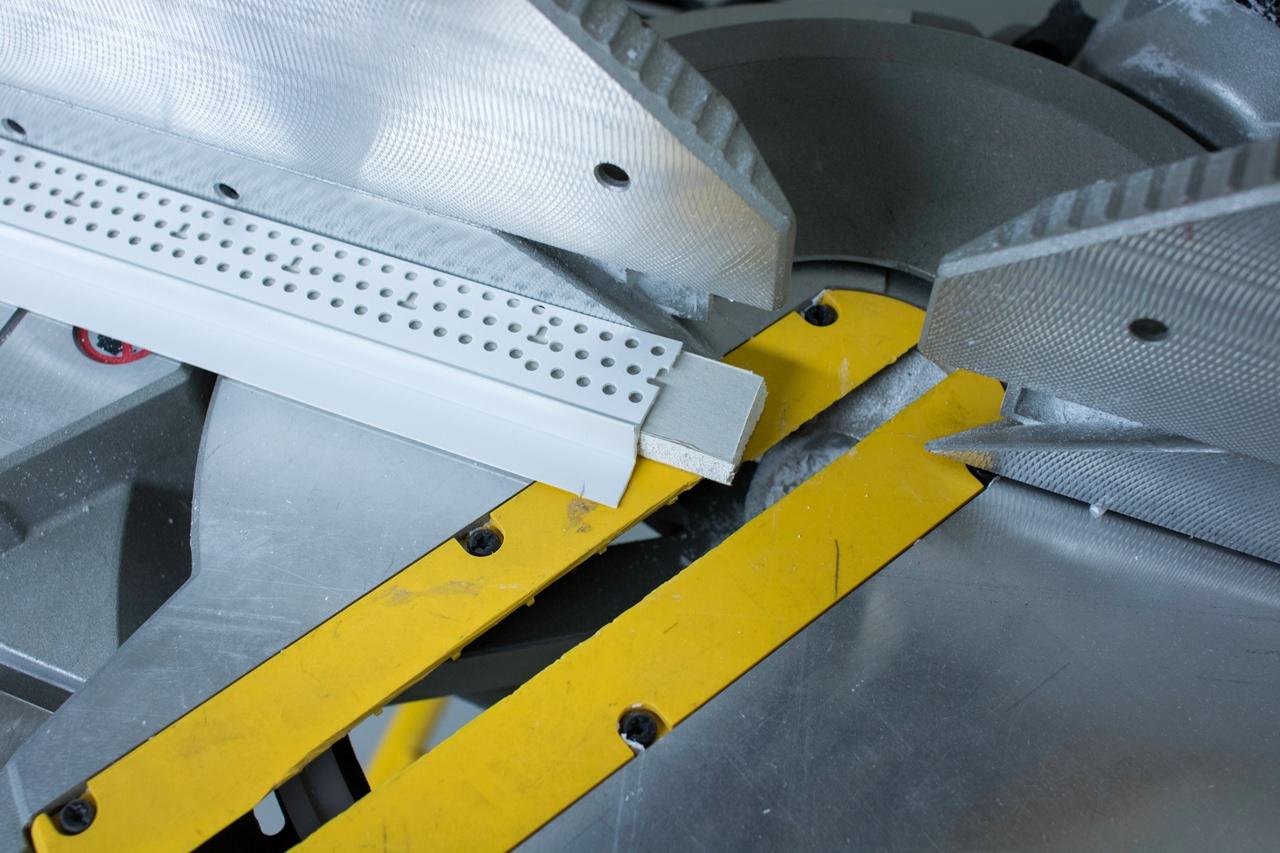
Place the mud leg over the scrap drywall (as shown above) and cut the Architectural Z Shadow Bead at a 45-degree angle. Dry fit the bead around the door frame before installing to double-check that your measurements and angles were all correct. Optionally, before installing the bead, you can apply a dab of some adhesive caulk to the mitered edges of each of your beads for a slightly cleaner look around the joints, using a clean brush or just a scrap piece of bead to remove any excess adhesive.
USING SNIPS & UTILITY KNIFE
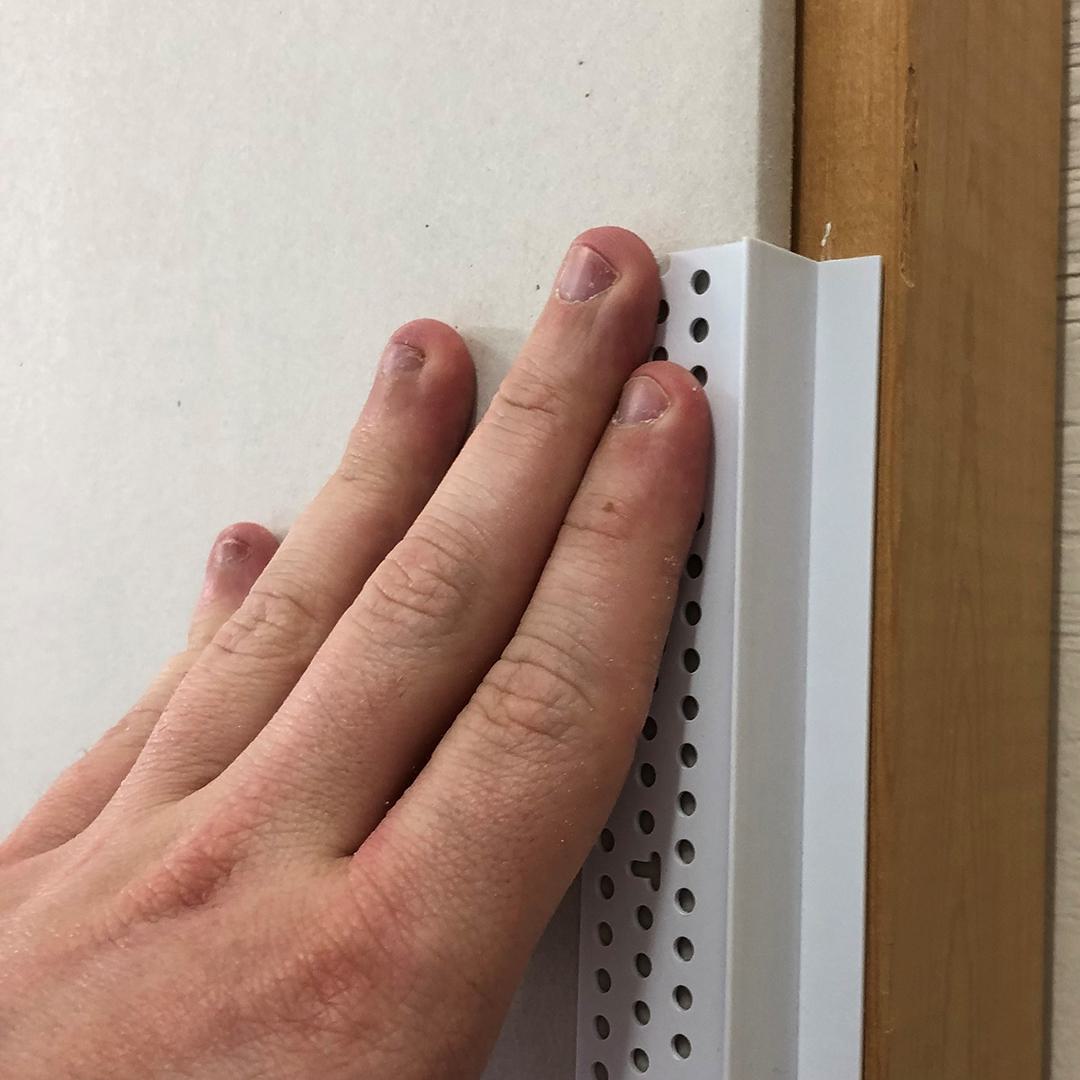
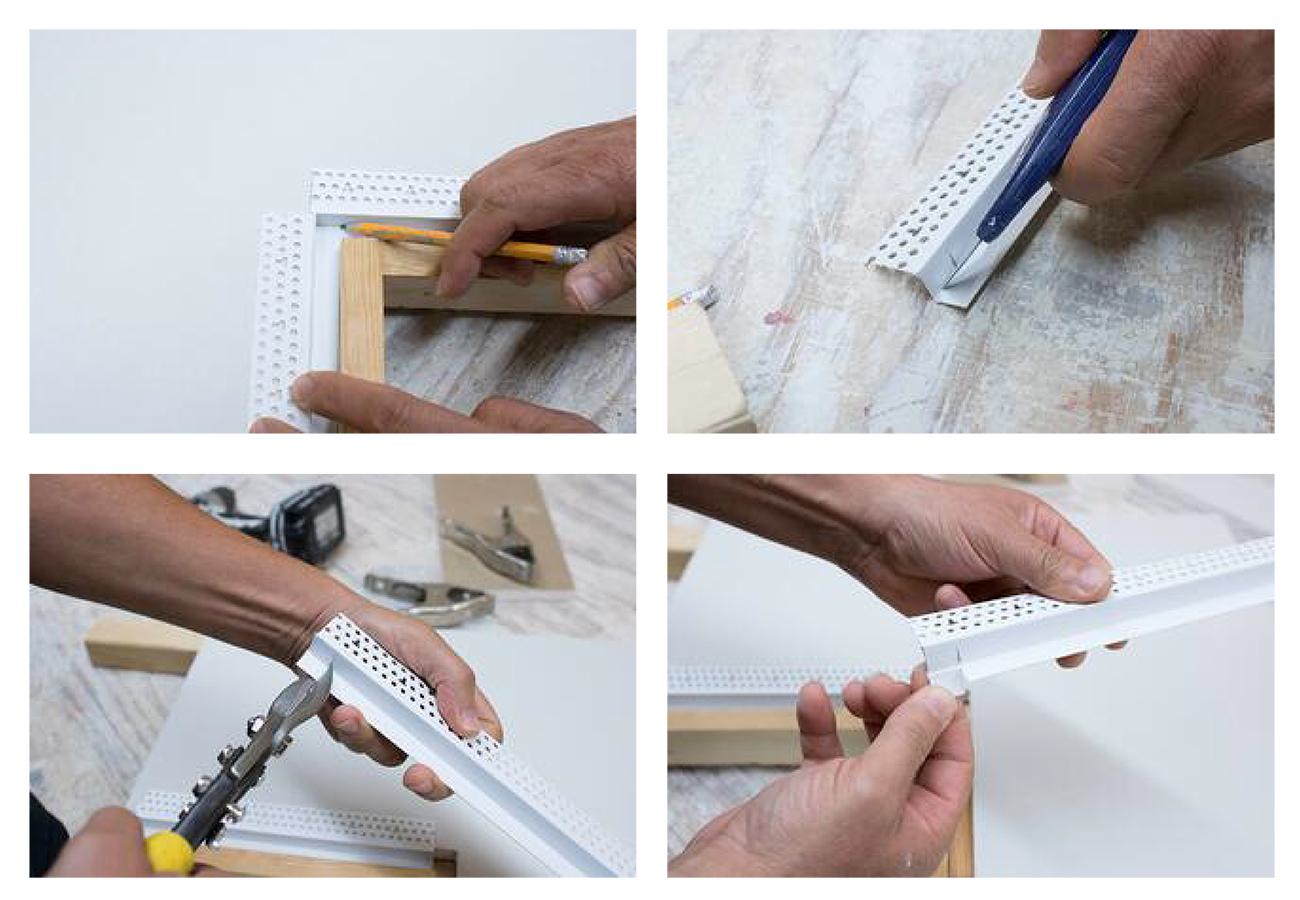
If you do not have access to a miter saw, simply use a pair of snips to achieve the minimalist look of a trimless door. Place two lengths of the Architectural Z Shadow Bead — one running up the side of the doorway and one across the top — over your drywall so that they butt against the door frame. Overlap the two pieces of bead and use a pencil to mark where they meet. Use a utility knife to score the center of the return leg on the Architectural Z Shadow Bead. Then use a pair of snips to cut along the pencil line and tear off the return leg. Of course, you’ll need to do the same process for the other side of the door frame.
Dry fit the bead on the door frame to ensure there are no unsightly gap between the beads. Again, you could use a dab of adhesive caulk in the joint between the beads, but you’ll probably be fine moving on to installing the bead.
From here, install the Z Shadow Bead the same as you would any other vinyl corner bead. We recommend using a light coat of 847 Spray Adhesive, then stapling the bead into place before mudding.
By the time you’ve applied all the necessary coats of mud (depending on what level of finish you’re trying to achieve) and painted your door jamb and surrounding wall, you’ll have a unique and modern doorway to accent any room with subtle flair.
If you want to create a trimless door with Architectural Z Shadow Bead for yourself, you can get started by simply requesting a free sample of the solution by filling out the form below!

Get a Free Z Shadow Bead Sample
Z Shadow Bead is your key to executing elegant drywall designs, from stylishly trimless doors to walls that appear to float above the ground.
Request A Sample